BY WILLIAM BUSBY, GREG "MADDOG" KNAUSS, DAN MOORE, JIM PIERSON-PERRY, DAVE SMALL AND THE START STAFF: THOMAS R. BYRON, AMY H. JOHNSON AND JAMES BURTON
The authors thank Toad Computers,
Severna Park, Md.; Mid-Cities Comp/Soft, Bellflower, Calif.;
and Atari Technical Support for
providing valuable answers and advice.
PHOTOGRAPHY BY CHLOE ATKINS
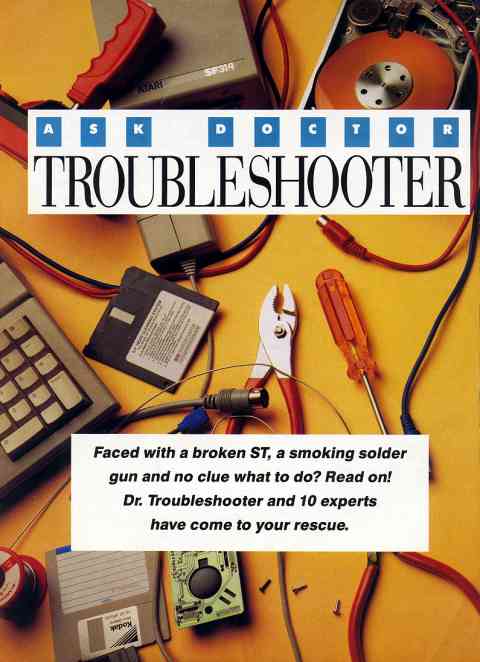
Like any complex machine, computers break. Some problems are easy to fix - a broken cable, a misunderstanding - while some require an experienced technician. But which is which? This troubleshooting guide will tell you. Dr. Troubleshooter assembled a team of 10 experts to explain the simple fixes and tell you when you need that experienced help.
For ease of use, Dr. Troubleshooter split the guide into 10 areas of functionality. Happily, the 10 areas of functionality coincide with the 10 experts' areas of expertise. Each section is organized as follows: a statement or question summarizing the problem; its likely cause; a diagnosis, which is either an explanation of what went wrong or a way of confirming the cause; and a cure, a step-by-step fix of the problem.
Dr. Troubleshooter regrets that this guide is by no means comprehensive. To do such a thorough job would require several books. Luckily, Ralph C. Turner has written two books which answer hundreds of questions about the Atari ST, covering areas from beginner's confusion about GEM to experienced user's tricks with complex software. The Atari ST Book and Intermediate And Advanced Atari ST Subjects are available from Index Legalis Publishing Company, P.O. Box 1822-3, Fairfield, IA 52556 (515) 472-2293.
And last, but not least, at the advice of Mr. Lawyer, Dr. Troubleshooter presents the following disclaimers and caveats.
Number 1: Opening up hardware to perform your own repairs may violate your warranty. Check with the manufacturer before you remove the cover.
Number 2: Undertake any repairs at your own risk. You, and you alone, are responsible for the results, good or bad, of any testing, tweaking, poking, soldering, reseating, replacing or repairing that you perform. Dr. Troubleshooter, the 10 experts, the authors and START magazine make no warranties either express or implied with respect to this troubleshooting guide, its quality, accuracy, merchantability or fitness for any particular purpose.
Number 3: If you don't know what you're doing, ask for help. Your Atari dealer, product manufacturers, user groups and the online services are excellent resources. Use them.
Number 4: There is no ongoing support
for this troubleshooting guide. Do not write or call with your particular
problem. Dr. Troubleshooter, the 10 experts, the authors and START magazine
cannot and will not diagnose or attempt to fix your problem over the telephone
or through the mail. If you can't figure out what's wrong, call the manufacturer
or take the broken product to an authorized Atari repair shop.
ASK DOCTOR
DESKTOP
Why, when I try to run a certain program, do I only get an alert box that says "TOS Error #35"?
CAUSE The program you are trying to run is not executable on the ST. "TOS Error #35" is the ST's way of telling you that it doesn't understand what's contained in the file.
DIAGNOSIS There can be a number of reasons for this. If you downloaded the file from a bulletin board, it could have either been corrupted during the transfer or, more likely, wasn't meant for the ST. If the file has been around for a while, on either a floppy or a hard disk, there is a small chance that the disk has been scrambled.
Also, maybe the disk and file are fine, and the file's contents are not a program. Sometimes a random file may accidentally be renamed as a program (.PRG, .APP, .TOS or .TTP files), and the ST will respond with "TOS Error #35" when you attempt to execute it.
CURE Unfortunately, if the file is corrupted, you've got one shot at fixing it. Disk Doctor, from Antic Software, has an option to try to fix a damaged file. It only works on files whose "table of contents" is scrambled; if the actual file data is corrupted, it cannot reconstruct it. If the latter is the case, better bring out your backup. Disk Doctor is in the TOOLS folder on your START disk, in the ARCed file DSKDRARC.PRG.
In the case of the misnamed file, change its extension to TXT (use the
Show Info.., option under the File menu) and double-click on it. If the
contents appear as normal, readable text, then it's a data file, not a
program file.
How come there are only six desk accessories available when I use my ST, even through I have 15 or so in the root folder of my boot disk?
CAUSE GEM, the ST's user interface, limits the number of desk accessories available at any one time to six. Any extras that are available on the boot disk are ignored.
DIAGNOSIS AND CURE If you need more than six desk accessories at one time, CodeHead Software sells a program called MultiDesk that loads a potentially infinite number of DAs at one time, the amount of memory in your computer being the only limiting factor.
If you would like to be able to choose which six Das load up each time
you use your computer, there are a number of programs that allow you to
do that, most in the public domain. Desk Manager 2, HAZEL, and a host of
other are available from BBSs and users groups. HAZEL is available On this
month's START disk, in the ARCed file HAZELARC.PRG. in the TOOLS folder.
Why does my computer always boot up in low resolution with the default colors even though I changed the settings the last time I used it?
CAUSE You didn't save the changes you made before turning off the computer.
DIAGNOSIS AND CURE To save the changes you have made to your desktop, you need to use the Save Desktop entry in the Options menu. This will write your configuration to disk, in a file named DESKTOP.INF, so it can be automatically reloaded the next time you boot up. Also, you should remember that if you want the options you set in your Control Panel to be restored (colors, double-click speed, etc.), the Control Panel must be present. Even if you saved changed colors, for instance, they will be reloaded only if CONTROL.ACC is in your boot folder.
If you have an STE computer, you may find that the computer boots in
low resolution even though you have saved the Desktop in medium resolution.
This a bug with TOS 1.6. There is a patch program, STEFIX.PRG, that fixes
this problem. STE_FIX.PRG is on your START disk, in the ARCed file STEFXARC.PRG,
in the TOOLS folder.
My computer is acting oddly. Some programs that have worked in the past don't anymore.
CAUSE There could be several reasons: you have a TSR conflict, you have a corrupted file, or you have a virus.
DIAGNOSIS Dr. Desktop covers viruses and corrupted files in other questions.
The most common reason for programs to stop working is TSR conflicts. A TSR is a terminate-and-stay-resident program, designed to stay in memory and wait for you to use it, like desk accessories and certain programs from your AUTO folder. If you started having trouble after adding a new program to your start-up disk, try removing that program and see if the situation goes back to normal. If it does, then the new program is the culprit.
CURE There are a number of things you can do to avoid TSR conflicts. The CodeHead program AUTO_ORG.PRG reorganizes the order of the files in your AUTO folder, and that will often remove some conflicts. A few programs need to be run before everything else, or they will heedlessly trample over whatever is in their way. Check the program's documentation. The only way to determine a workable TSR order is through trial and error. Delete everything from your AUTO folder (copy it to another disk first!), then add TSRs one at a time, rebooting each time to test them. If conflicts appear, reorganize them until they stop clashing. Continue until you replace all your TSRs in the AUTO folder.
Some TSRs are sworn enemies; they will not work with one another, no
matter what. In that case, get Desk Manager 2, HAZEI., or any other start-up
file chooser and simply remove the offending TSR each time you are going
to use its enemy.
Every time I try to run a certain program, the computer tells me that I don't have enough memory.
CAUSE Either the program requires more memory than you have available (for example, some START programs will only run on a 1MB machine; you're out of luck if you have an unmodified 520ST), or your desk accessories and TSRs are eating more memory than you realize.
DIAGNOSIS AND CURE
Check your program's documentation for the minimum amount of memory required
to run it. If you suspect your desk accessories and/or TSRs are interfering,
remove some or all of them and reboot before using that program. By definition,
DAs and TSRs grab memory (sometime huge chunks, more than you may realize)
at boot time and keep it for their sole use until you turn off your machine.
If you are having memory troubles often, however, the best solution is
to upgrade your RAM.
What do those bombs that appear on the screen mean? Is the computer broken?
CAUSE No. Bombs are just the computers cute way of telling you that it's had a crash that it couldn't recover from, also known as a fatal error.
DIAGNOSIS Bombs usual usually result from garbled machine language (a bug in a program, or your ST burping for no apparent reason) or conflicting TSRs. The number of bombs tells you what type of fatal error the problem was - important information to the programmer, but not much help to the user.
If bombs happen regularly at hoot up, you may have conflicted TSRs. or possibly a bad chip.
CURE Rebooting the
computer and starting over is, unfortunately, the only solution. If bombs
happens regularly at boot up, try the cure for conflicting TSRs. If that
doesn't stop it, suspect a bad chip and take our computer to a repair shop.
After using my computer for a while, I suddenly start to get scrambled file listings. The problem goes away if I reboot. What's going on?
CAUSE You have encountered the infamous 40-Folder Bug.
DIAGNOSIS Because of a mistake in the early versions of TOS, any time you try to access more than 4() folders in one computing Session, the computer will get confused and start returning garbage in windows.
CURE The solution
is simple. On this month's START disk you'll find a public-domain AUTO
program, called FOLDRxxx.PRG. that will raise this limit to whatever you
wish - just substitute the number of additional folders you want for the
"xxx" in the filename. One hundred is safe for the vast majority of people.
I just accidentally deleted an important file.
CAUSE You weren't paying attention to the confirmation box, or you don't have the Confirm Delete option active.
DIAGNOSIS On the Desktop, under the Options menu, choose the Set Preferences entry. Along with resolution, you're asked to choose whether you want a confirmation box to appear before the ST performs any file overwrites, copying or deletions. The Yes option should be highlighted.
CURE If you want your preference for Confirm Delete to be available the next time you boot, highlight the Yes choice, exit the menu and save your Desktop.
In order to recover the file you accidentally deleted, use the recover
file option in Disk Doctor, which is on your START disk in the TOOLS folder.
It only works under specific conditions. If you have written to the disk
since deleting the file, its contents have probably been destroyed, leaving
it unrecoverable. The best remedy against accidental file deletion is a
consistent back-up schedule.
When I try to erase a certain file, the computer tells me, "An item with this name already exists in the directory, or this item is set to Read Only status."
CAUSE The file is write-protected, preventing it from being deleted or changed.
DIAGNOSIS Click on the program to highlight it, then choose Show Info.., from the File menu. In the Show Info dialog, you should see that Read Only is highlighted.
CURE Click on Read\Write.
then OK. The file can now be modified or trashed.
What can I do to prevent a virus infection?
CAUSE Viruses live on the boot sector of a floppy disk. If you boot your computer from an infected disk, the virus program is loaded into memory, then run. The virus watches for any disk access, and if it finds a disk that isn't write-protected, it copies itself onto that disk. It stays active until the computer is turned off. After a certain amount of time, a certain amount of copies, or if a certain disk is placed in the drive (a "key" disk), the virus is triggered to do it's irritating, or even dangerous, dirty work.
DIAGNOSIS If your mouse suddenly changes direction, if a strange message appears on your Desktop, if part of your screen turns upside-down. you have a virus. Some viruses are known to mimic a hardware problem, such as a jittery screen, apparently trying to fool the user into taking his machine to the repair shop. A worse case scenario; the virus erases a disk, or formats your hard drive.
CURE If you suspect that you've been infected by a virus, use George Woodsidc's Vkiller program to test all your disks. Vkiller, which detects viruses and erases them, appeared in the May 1990 START. To get the latest version, check with your user group, or download it from CompuServe or GEnie.
PREVENTION Never hoot your computer with an "unknown" disk. Make a virus-free boot disk, and use it to boot every time. To make a virus-free hoot disk, turn your computer off, and leave it off for at least 30 seconds. This is important! It takes a while for memory to be completely cleared, and you want to make sure that any virus in memory is erased. Now remove any disks from your drives, and turn off your hard drive, if you have one. Turn on your ST. Since there isn't a disk in the drive, it will take a while for the system to boot. When the Desktop finally appears, insert a new disk -one fresh from the manufacturer - then format it. From virus free disks, copy any AUTO folder programs or accessories to the disk, then physically write-protect the disk so that no other information, such as a virus, can be written to it. Now, as long as you boot from this disk, a virus cannot infect your ST and spread to other disks. Also, if you forget and boot from another disk and get infected, the virus cannot infect your boot disk because it's write protected.
The protection scheme described above only works if you have TOS in ROM. If you have TOS on disk, now is a good time to upgrade. Talk to your Atari dealer about buying TOS on ROM.
Once you're virus-free, use Vkiller to stay that way. Test any questionable
disk before you put it in your machine. By questionable Dr. Desktop means
any disk that's ever touched the lips of someone else's floppy drive. Computer
viruses, like human ones, strike indiscrimitiately; you call get one from
your best friend as easily as from a stranger.
ASK DOCTOR
KEYBOARD
One specific key on my keyboard doesn't work.
CAUSE You've got either an up problem or a down problem. The down problem is when the plunger underneath the cap of the key, the thing that is pushed down to close the contact, breaks. The up problem is when the small rubber cup (on the 520 and 1040 keyboard) or the spring (on the Megas) that pushes the plunger back up shifts to where it can't do its job.
DIAGNOSIS If the key won't return after it has been pressed, or won't go down in the first place, you've got an up problem. If the key falls off the keyboard, you have a down problem.
CURE If you can salvage the pieces of the plunger, gluing them hack together will solve the down problem. Salvaging the pieces of the plunger means disassembling the keyboard unit. This procedure, however, is not easy. It's not a problem to take the cover off the computer. (Be sure to unscrew only the screws near the edge of the machine. There are several screws near the middle of the ST which hold the floppy drive in place.) The keyboard lifts out. Now you need to unscrew the back cover of the keyboard unit; dozens of springs, or cups, pop out. After you've put them back in place, getting them to stay there while you replace the keyboard unit's cover is a pain.
If you have an up problem, you need to realign the cup or spring that pushes up the key's plunger. Again, with appropriate warnings given above, disassemble the keyboard. Since every cup, or spring, will pop out, just make sure you replace them correctly.
A service center can fix either problem, but they may want to replace
the entire keyboard, just to keep the job simple. Ask what it will cost
before handing over your ST.
A whole section of my keyboard doesn't work.
CAUSE Computers that take a lot of abuse sometimes develop cracks in the circuit board's wiring.
DIAGNOSIS Since the keyboard's wiring is laid out like a matrix, usually one wire will carry signals to and from a group of keys. Make sure the non-functioning keys are grouped together. If they're scattered about the keyboard, you have multiple occurrences of the problem discussed above.
CURE The only solution,
because the crack is in a lead along a printed circuit, is to have the
keyboard replaced.
My whole keyboard is dead.
CAUSE One or both of the keyboard chips is bad.
DIAGNOSIS There is one chip on the keyboard unit which sends signals to another chip on the ST motherboard via a ribbon cable. To figure out which chip is had, borrow a friend's keyboard unit and plug it into your motherboard, if your friend's keyboard works, suspect the keyboard unit chip. The motherboard chip also handles input from the mouse and joystick. If these peripherals, as well as your keyboard, aren't working, then suspect the motherboard chip.
CURE Keyboard chips are custom made, so only Atari and some Atari repair shops stock them. Once you get one, it's easy to replace. The chip is socketed onto the bottom of the keyboard unit; you don't need to open it up and experience the flying caps or springs. Simply pry out the bad one and plug in the new one.
It's not as easy to replace the keyboard chip on the motherboard. The
chip is a Motorola 6850, available at well-stocked electronics stores.
It is soldered to the motherboard, and there are two of them. One 6850
receives keyboard signals; the other controls the MIDI ports. You need
to either read the ST's schematic or trace the wiring to figure out which
is the right 6850. Then you must remove the bad chip and solder in the
new one. If you have no experience soldering, this isn't the time to learn.
Take your computer to a dealer.
ASK DOCTOR
FLOPPY DRIVE
I keep getting the error message that my drive "is not responding:" What's wrong?
CAUSE It could be anything. Specifically, it could be a bad disk, a bad cable, a bad drive, a bad power supply. or a bad floppy-disk controller in your ST. You also could be attempting to read a double-sided disk with a single-sided floppy drive.
DIAGNOSIS First, make sure that the drive access light comes on when you try to read the disk. If it doesn't. make sure that the drive has power, and that it's turned on. If all the connections are in place, your power supply may be dead.
If the access light does come on, try reading another disk. If it works, then your original disk is bad. If it doesn't, try yet another disk (in case the second disk is bad, too). If the drive refuses to read any disks, test the cable which connects your drive to the ST. Make sure it's plugged in! Try replacing the cable with a friend's good cable. If the cable is OK, then the problem is with the drive or the computer. Borrow a friend's drive and connect it to your ST. If it works, your drive is broken. If it doesn't work, suspect your ST.
Before you take your machine into a dealer for repair, make sure you aren't trying to read a double-sided disk with a single-sided drive. During their first years of manufacture (1985 and 1986), Atari sold both 520-STs and 1040STs with internal single-sided drives. Megas have always carried double-sided drives. Atari also sold an external single-sided drive, called the SF354. To the best of our knowledge, no third-party vendors sold single-sided drives during that period. Check what kind of drive you own by trying to read a single-sided disk (357,376 bytes) and a double-sided disk (726,016 bytes). The Show Info.., option under the File menu will give you disk size.
CURE If it's a bad disk, hopefully you've got a backup copy somewhere. For a bad cable, buy another cable from your Atari dealer. If the drive access light refuses to come on, and you can't hear the motor spin, then your drive's power supply needs replacing, or the power switch is broken. If the drive is still under warranty, follow the warranty instructions. Otherwise, get your local dealer to fix it. Many times, "fixing" a disk drive simply involves replacing the broken drive mechanism with a new one, so you end up with a new drive in an old case. If your ST seems to be the culprit (or if you have an internal disk drive that won't work), you'll also need to see your authorized Atari dealer.
If you're trying to read a double-sided disk with a single-sided drive,
you have two options. You can buy a double-sided drive, or you can convert
the double-sided disk to single-sided. Most manufacturers of commercial
disks will exchange double-sided ones for single-sided. Alternately, you
can get a friend with a double-sided drive to copy the files onto two single-sided
disks.
I've tried chaining three disk drives to my ST. The first drive works fine, but not the second or third.
CAUSE The ST can access only two floppy drives. When you chain a third drive to your computer, it tries to access it whenever you access the second drive, and vice versa. Very confusing.
DIAGNOSIS AND CURE
Remove the third drive; the second drive should now work fine.
Sometimes I get "garbage" on the Desktop window when I open a disk.
CAUSE Most likely, a worn-out disk. Another possibility is a dirty or worn read/write head.
DIAGNOSIS If it's just a certain disk that sometimes gives you garbage characters, then the magnetic coating on that disk may be wearing thin. If this seems to happen no matter what disk you use, the read/write head on the drive is dirty or worn out, or a piece of hair or other debris is interfering with the head.
CURE If it's a worn disk, you'd better copy it right now! Eventually, the magnetic coating will fail altogether, and the information on that disk will be lost.
For a dirty read/write head, purchase a 3.5-inch disk-drive cleaning
kit and follow the instructions to clean the drive. If the problem persists,
then the head may be worn out, and it will need to be replaced. Don't try
to replace it yourself unless you know - really know - what you're doing.
Drive heads need to be precisely aligned in order to work correctly. If
you suspect a worn head, it's time for a trip to your Atari service shop.
When I try to save something, I get a message that the disk "is physically write protected:"
CAUSE The disk is write-protected.
DIAGNOSIS Write protection prevents data on a disk from being accidentally erased or overwritten. If the sliding tab on the upper-left corner is open, so that the hole is uncovered, then the disk is write-protected and cannot be written to or formatted.
CURE Slide the tab
down so that the hole is covered. The disk is now unprotected.
My drive won't read disks from my friend's ST, yet it reads my disks fine.
CAUSE Either your drive or your friend's drive is spinning at the wrong speed. ST drives should spin at a rate of 300 rpm. If a disk was formatted at a slower or faster speed, a drive operating at the correct speed may not read it, and vice versa.
DIAGNOSIS All commercial, mass-produced disks are made at 300 rpm, so see if your drive has any problems reading the original disks from one of your commercial programs. If it reads the disk, then your drive is okay, but your friend's isn't. Use the program SPEED.PRG to test your drive. You'll find it on your START disk, in the ARCed file SPEEDARC.PRG, in the TOOLS folder.
CURE The drive's speed
can be adjusted by your dealer.
ASK DOCTOR
HARD DRIVE
Editor's Note: The following troubleshooting guide addresses some of the most common questions about hard drives. Hard drives are, however, very delicate machines and require someone with the requisite knowledge to fix any of the more complex - and potentially dangerous - problems that may occur. Therefore, use this information at your own risk. If you have any doubts about troubleshooting your hard drive, or want information specific to your equipment, call the manufacturer. All of the major hard-drive manufacturers for Atari computers have on-site technical support and service. Their numbers are as follows:
Atari Corp.: (408) 745-2135
ICD: (815) 968-2228
Supra: (503) 967-9075
Toad: (301) 544 4-6999
Carter Graphics & Computers: (801) 628-6111
Finally, the following information applies equally to fixed and removable
hard drives.
My hard drive won't turn on; nothing happens when I flip the power switch.
CAUSE This usually means a problem with the power supply or that the power wiring has gone bad.
DIAGNOSIS Power supplies fail more than anything else on a hard drive. First, check all of your connections -was the drive accidentally unplugged?
The fuse should be your next suspect. If it's not the fuse, there may be other problems. Sometimes a power supply is getting electricity but isn't translating that energy to the drive. Make sure the power strip is "hot." A quick meter check of the Power strip by an authorized serviceperson might not hurt. If it's getting power and still nothing is happening, the power supply may have to be replaced.
As far as the wiring is concerned, you'd be amazed at how many times the connector that brings power to the ACSI-SCSI board on hard drives can come loose; that'll paralyze the unit.
CURE If the drive is unplugged, plug it back in. If it's a simple matter of the fuse, make sure the replacement fuse has the same value on both ends (volts and amps) as the old one. lf power goes into the power supply and nothing comes out, you've got a bad supply and it will need to be replaced. Make sure it's tested with everything connected to the power supply; an unloaded supply often shows no output at all.
If the problem turns out to be one of those outlined above, you usually don't have to worry about data being lost. This is because the hard disk itself wasn't damaged. lf you find out that the actual hard-disk mechanism is broken, then you may be stuck and you've probably lost all of your data, There are shops that can sometimes retrieve data off dead hard disks, but the process tends to be very expensive.
If the wiring is causing the trouble, make sure all the plugs are firmly
seated. A loose plug can work for a while, then oxidize and quit. Again,
this may have to be diagnosed and fixed by your local serviceperson.
My hard drive's head spins but the drive and the computer don't appear to be communicating with each other.
CAUSE Your first suspect should be a bad hard-drive cable. If this isn't the problem, then the ST's DMA chip should be checked.
DIAGNOSIS DMA stands for direct memory access. Simply put, it's a way for the hard drive to access RAM directly rather than through the 68000 CPU, which would slow down all processing because of the extra load. Since all requests to read and write to the hard drive must go through this chip, the hard drive is effectively incommunicado when it fails.
CURE Swap your ST/hard-disk cable with a new one. Throw away the bad cable - it can't be re-used.
A had DMA chip is a littler trickier to fix and may require someone who is expert at such things to check it out. Most of the time reseating the DMA chip cures the problem. Reseating is simply pushing down on the chip and wiggling it at the same time. What you re doing is scraping off a tiny layer of oxide corrosion on the pins and on the socket. You'll usually find the DMA chip in front of the hard-disk port. Of course, antistatic precautions are essential; if you don't know what they are, get help from someone who does.
If the cable or DMA chip fixes don't work, hook your hard disk to another
ST and see if it works. If your hard drive runs, your ST may be bad - take
it to a dealer to get it fixed.
When autobooting
from the hard drive, my computer bombs.
CAUSE One of your
terminate-and-stay-resident (TSR) programs or desk accessories is incompatible
with something else in your system.
DIAGNOSIS As explained by Dr. Desktop, TSRs and desk accessories sometimes don't work well together. Perhaps you just bought the latest file selector. After you installed it onto your hard drive, your computer bombed, even after several reboots.
CURE First, you need to access your hard drive so that you can disable the offending auto-load program, or to at least experiment with different auto-load configurations. Most manufacturers ship their hard drives with a utilities disk. One of these utilities is usually labeled BOOT.PRG or a variation thereof (for ICD drives, for example, it's ICDBOOT.PRG).
Boot your computer with your utilities disk. Next, turn on the hard drive. When the disk stops spinning, double-click on your boot program. You should notice some hard-disk activity and a brief message flash on the screen informing you that the boot program is installed.
At the Desktop, click once to highlight the icon for either drive A
or B, then click on Install Disk Drive from the Options menu. Change the
drive designator to whichever partition your AUTO folder is on. The new
disk icon will appear; now either disable the offending TSR or experiment
with different configurations until your drive no longer crashes.
My hard drive appears to be working, but when I boot up only floppy icons appear.
CAUSE You turned the computer on too soon, your hard-disk cable is bad or there's a problem in the autoboot sequence.
DIAGNOSIS It often takes several seconds for the hard disk to spin up to speed. Nothing can be read from the hard drive (like the boot sequence) until it gets up to speed. By default, your ST assumes the hard drive is absent from your system.
CURE Wait until the
disk stops spinning before you start up your computer (most hard drives
include a light - often red - that indicates that the head has stopped
spinning). Note that the STE and TT have a built-in delay that lets the
hard drive get up to speed so that both the computer and drive can be turned
on at the same time. Refer to previous questions regarding faulty cables
and problems in the autoboot sequence.
The hard disk squeals unbearably all the time.
CAUSE The small copper "strap" where the head spindle touches the hard-disk mechanism needs oil.
DIAGNOSIS AND CURE
A small drop of oil here can cure the squeal, but don't overdo it! Oil
attracts dust and if you apply too much, you'll really get a squeaky drive
in a few days. Also, very gently loosen the strap, just a little bit, and
see if that helps.
My hard drive is damaged beyond repair and the whole unit has to be replaced. Is there any way to retrieve the data or is it gone for good? By the way, I didn't make a backup.
CAUSE Things break all the time and hard disks are no exception. That your data is irretrievable may be due to any number of reasons, it's possible you damaged a sector in one of your partitions. Suffice to say, if you damage one partition sector, they're all lost to you.
DIAGNOSIS AND CURE Electronic data is very fragile. Hard drives were never meant to protect your data from unforeseen circumstances such as coffee spills or magnetic interference, but only as a way to store and access large amounts of information.
Fortunately, there are several ways to retrieve data that seems irretrievable. When a hard drive "crashes," you often can restore the data through a partition-sector editor, which should be included on your hard-drive utilities disk.
Restoring a partition sector is not as complicated as it first sounds. If you took the time to write down all of its specs, then you can use a utility such as Supra's SUPEDIT and punch in the partition sector data. You'll then be able to retrieve the data from your hard disk. If you didn't write down the partition info and never used Meg-A-Minute Elite, which backs up the partition sector, you can either reformat and lose all your data, or try to restore the partition sector by hand. It's not easy to restore a partition sector by hand. But try to remember exactly how many megabytes your partitions were. Mostly, everyone uses even numbers: 5MB or 10MB. Try using these values for partition sizes:
1MB = 2,000 sectors
2MB = 4,000 sectors
5MB = 10,000 sectors
10MB = 20,000 sectors
15MB = 30,000 sectors
16MB = 32,000 sectors
Plug these values into the SUPEDIT partition-edit utility, remembering
to leave one-sector "slop" for fencepost error. For example, let's assume
you have a strange disk layout of 1MB, 5MB, 10MB and 2MB partitions in
that order (C,D,E,F). Your partition table should look like this when you're
done with SUPEDIT:
| Starting Sector #
1-2001 2002-10002 12003-20003 32004-40004 |
Length
1MB 5MB 10MB 2MB |
You can see what we mean by "fencepost error"; 2,000 sectors takes us from sector I to sector 2001, so the next partition starts at sector 2002.
When finished, tell SUPEDIT to write this out as your partition sector. After this, you won't be able to boot from the hard disk, but you will from floppy; follow the procedure outlined earlier for accessing a hard drive through the boot utility.
If the partition-editor fix doesn't work, then forget it; the data's gone and you'll have to reformat your hard drive and restore the data any way you can. And if you didn't make a backup, well, you blew it.
PREVENTION There are a number of ways to back up your hard drive. The most convenient but expensive is the 'The Backup from ICD. It backs up your hard drive onto a cassette tape in a matter of minutes. The DVT VCR backup from Seymor/Radix, does essentially the same thing except to video tape.
The most basic and least costly way to back up your hard drive is to
floppies. You can either do a straight copy of your hard drive contents,
which can be very time consuming, or you can use one of several floppy-disk
backup systems. Data Innovation's Diamond Back will back up your hard drive
within minutes; Meg-a-Minute Elite, from the November 1988 issue of START,
is republished on this month's START disk in the TOOLS folder. Un-ARC the
file MGAMNARC.PRG. The public-domain Turtle also offers an effective solution.
ASK DOCTOR
MONITOR
My monitor screen stays black when I turn it on. Is there anything I can do?
CAUSE A monitor screen that stays black often indicates trouble with either the power supply or flyback transformer. It's also possible that your picture tube blew.
DIAGNOSIS Don't bother. Monitors are the one peripheral whose cover you should never remove.
CURE Take your monitor
to an authorized Atari dealer for repairs. Do not attempt to fix it yourself;
you'll just do more damage.
No matter how much I fiddle with the volume/contrast/power control, nothing happens.
CAUSE There are two possibilities: you have a loose wire, or the control knob has a broken switch. DIAGNOSIS See the answer above.
CURE Sec the answer
above.
The picture on my color monitor rolls vertically (or skews horizontally).
CAUSE Your monitor dropped out of alignment.
DIAGNOSIS It looks
like your TV picture after someone's been fiddling with those obscure knobs
below the
channel selector.
CURE On the back of
your monitor are adjustments for things like vertical hold, horizontal
position and brightness. The control knobs may stick out or they may be
inset so that you need a screwdriver to reach them. Adjust the knob that
corresponds to the trouble you're having. If the problem doesn't go away,
see above.
ASK DOCTOR
MOUSE
My mouse's movement is erratic; it's bumpy and jerks when it should be rolling smoothly.
CAUSE Gunk has built up on the rollers.
DIAGNOSIS It's easy to check the rollers. Open the small door on the bottom of the mouse, remove the rubber ball, and look at the rollers while spinning them. If you see anything but shiny metal you need to clean them.
CURE It's hard to
reach the rollers through the door on the bottom of your mouse, so find
a Q-Tip and rub the gunk off the rollers. There are three of them. Often
little dust mice will gather between the roller and the circuit board;
you'll have to poke them out with a toothpick.
When I move the mouse one direction I don't see any effect on the screen cursor.
CAUSE Probably a broken cable.
DIAGNOSIS According to some reports. 60 percent of all mouse repairs involve broken cables. Almost all breaks occur at the bend in the cable where it attaches to the mouse.
One sign of a bad cable is intermittent operation. For a while the mouse works fine, then something stops working, but jiggling the cable gets it working again. To confirm a bad cable, borrow one from a friend and install it on your mouse. The cable is a self-contained unit that plugs onto the mouse circuit hoard (you'll have to open up the mouse) by a ribbon cable.
CURE Buy a new cable.
Cables are easy to get through a service center or mail order.
One of my mouse's buttons stopped working.
CAUSE Either your cable broke, short circuiting the wire which transmits the button's signals, or the switch inside your mouse broke.
DIAGNOSIS You can try the "test with a working cable" trick. If that doesn't solve the problem, suspect the switch.
CURE Buy a new cable, or open your mouse and replace the switch. First, buy a switch from a well-stocked electronics store or your Atari repair shop.
There is a difference between the right mouse- button switch and the
left, so be sure to buy the correct one. Remove the solder holding the
defective switch, pull it out, put in the new one and solder it down.
My mouse is in for repairs. Now I'm stuck with a giant paperweight until I get my mouse back to manipulate the GEM point-and-click interface.
CAUSE You're obviously unaware of the mouse's keyboard equivalents.
DIAGNOSIS AND CURE
[Alt]-[Arrow Key] moves the mouse pointer eight pixels. [Alt]-[Shift]-[Arrow
Key] moves the mouse pointer one pixel. [Alt]-[Insert]-[Arrow Key] emulates
a drag movement. [Alt]-[Insert] emulates the left button. [Alt]-[Clr Home]
emulates the right button.
My mouse died and I don't get any response when I try the keyboard equivalents given above.
CAUSE The 6850 chip on the motherboard, the one that handles signals from the keyboard, and the mouse and joystick ports, has failed.
DIAGNOSIS Nothing works - not the two mouse/joystick ports, nor the keyboard.
CURE See Dr. Keyboard's
answer to the dead keyboard problem.
Just my mouse died; the keyboard and joystick work fine.
CAUSE It's either the chip inside your mouse, or the optics.
DIAGNOSIS The controller chip handles all the mouse signals. If it dies, SO does your whole mouse. The optics are tiny squares of plastic that transmit and receive light. They're mounted on top of the circuit hoard on both sides of two, small, movement wheels in a plastic housing. The rollers on these movement wheels are in contact with the mouse ball; moving the mouse causes these rollers and movement wheels to spin. The mouse works by sending light through the movement wheels. The openings in the movement wheel break the light into pulses. The pulses are interpreted to provide the direction and speed of movement.
You can't really diagnosis this problem without replacing components; if your mouse works with new parts, then you know the chip and/or optics broke.
CURE The first step is to open the mouse (remove the screws holding the two pieces of casing together), remove the mouse ball, disconnect the cable and pop the circuit board out of the mouse body.
See how small the chips and the optics are? See how closely they're crowded together? Don't you think it's a good idea to put everything back the way you found it and take the mouse to an authorized repair shop?
No? I was afraid you'd say that. Proceed at your own risk.
Your next step is to buy new components. The mouse chip is a 75339F. The optics come in pairs, a transmitter and a receiver. You can find the chip and the optics at an Atari repair center or a well-stocked electronics store. Next, haul out your Phillips screwdriver, some wire clippers, tweezers or small needle-nose pliers, your soldering iron and a vacuum desoldering tool. Use rosin-core solder, not acid-core.
Remove the bad optics. Looking at the top of the circuit board, the optics on the bottom right of the mouse-ball hole control horizontal movement, the optics on the upper left control vertical movement. There may be a small metal strip around a pair of optics, or they may be held in place with plastic. Carefully remove whatever is holding the optics in place. You may also need to pop out the movement wheels.
Use a vacuum desoldering tool to remove the solder from the bottom of the circuit board holding the optic leads in place. Turn the board over and from the top, use the tweezers to carefully pull the optic from its housing. This is the time for finesse, not force. To reduce the possibility for error, I recommend you remove and replace one optic at a time.
Install a new optic. Remember, an optic consists of a pair of plastic components. Look at the wires inside the optic you just removed and find an identical optic. Notice the bump on one side of the plastic of the optic. The hump on the face of the optic should point towards the movement wheel when installed. Slide the leads of the new optic through the holes in the circuit board; again, don't force them. If they don't slide in easily, check the holes for excess solder and remove it. Using finger pressure, push the optic into the optic housing. It should fit snugly and you must line it up exactly like the optic you removed. Apply the solder to the optic leads from the bottom of the circuit board. Notice how close some of those traces are together -don't solder a short circuit onto the board. Don't cut the excess optic lead yet.
Check the connections. It should be pretty easy to see where each trace leads. Clip a volt-ohm meter set to the RX1 scale to an optic lead and follow the trace to another point and check for continuity. Wait until both leads are soldered and checked before clipping any leads; that way if you have to redo anything you've still got an optic to work with.
Repeat the above procedure until you've replaced all the suspect optics. I don't recommend replacing optics that aren't bad. That's just inviting trouble.
Replacing the mouse-controller is a little easier, mainly because you
have easy access to it. It's located on the underside of the circuit board
and is labeled 339. You need to clip the leads, gently pry it off, and
solder on the new one. Make sure you orient the chip properly, or else
you'll switch power pins and fry the chip. This repair is not recommended
for amateurs.
I have a cordless mouse that stopped working. What's wrong?
CAUSE Dr. Mouse doesn't know. Dr. Mouse doesn't want to know.
DIAGNOSIS AND CURE
Dr. Mouse prefers to forget Physics 5D, the semester spent studying light
and optics. Send the mouse hack to the manufacturer for repairs.
ASK DOCTOR
PRINTER
When I try to use my new printer, nothing happens except my ST freezes.
CAUSE Your printer isn't connected properly, isn't turned on, or isn't online. The ST takes a little while to finally determine that the printer isn't going to work. It will eventually give up and return to the Desktop.
DIAGNOSIS Make sure the printer has power, and is connected to the correct port on your ST. Most primers connect to the parallel printer port; some connect to the serial modem port. If you suspect a bad cable, borrow a cable and test it on your computer. Make sure the printer is turned on, and is online (check your printer manual to see how to put your Printer online).
CURE If all the connections
are okay, see if the primer works on another computer. If it doesn't, then
the printer is broken. If the printer does work on another computer, the
problem may be in your ST.
When I try to print the screen, only the left two-thirds of the screen gets printed.
CAUSE Unless you tell it differently, the ST assumes that you have an Atari printer connected. Chances are you actually have an Epson-compatible printer.
DIAGNOSIS You need to use the CONTROL.ACC program that came with your ST. This program needs to be in the root folder on your hoot disk. Boot your computer so that CONTROL.ACC is loaded and activated, then choose Control Panel from the desk-accessory menu (leftmost menu). (On older versions of the Control Panel, both Control Panel and Install Printer appear under the desk-accessory menu. If you see both, choose Install Printer.) Click on Install Printer, and look at the dialog box that appears. You will see an item labeled Pixels\Line. Note that it's set to 1280.
CURE The 1280 setting
needs to be changed to 960. Click on 960, then OK. Now you need to save
this information to your disk, so that the ST will remember what kind of
printer you have. Click on Save Desktop from the Options menu, and a set-up
file called DESKTOP.INF is written to the boot disk. Now, as long as you
boot your computer from this disk, with has both CONTROL.ACC and DESKTOP.INF
on it, your ST is set up correctly for your printer.
When I print plain text, my printer is okay. But when I print graphics or the screen, I get garbage characters.
CAUSE Your printer is not an Atari printer, or is not a true Epson-compatible. If the program you're using requires a printer driver, you may have the wrong one installed.
DIAGNOSIS The GEM Desktop and many other programs expect the printer to understand Atari or Epson graphics-control codes, Epson being the de facto standard. Most printers are Epson compatible, or they can be made compatible by setting a certain DIP switch or pressing a certain sequence of buttons on the printer's front panel.
Since programs must work with a wide variety of printers, many use printer-driver files that translate graphics codes to a form a specific printer can understand. If you have the printer driver for the wrong printer installed, the program will output garbage.
CURE Ask the program's manufacturer if it has a printer driver for your particular printer. Read your program manual to discover how to install your driver.
If there is no driver for your printer, or if the program does not use
drivers, check your printer manual to see if the printer is switchable
to Epson-compatible mode, as outlined above. If so, switch it, then configure
your program to use the Epson driver. For example, if a program uses GDOS.
Atari's high-resolution printer program, you can use the FX80.SYS printer
driver. (The FX80 is an Epson printer.) If your printer isn't or can't
be made compatible, be careful to buy programs that specifically state
that they work with your printer!
My printouts are getting lighter and lighter. Putting in a new ribbon doesn't help.
CAUSE Your print head is worn out, or the spacing between the head and the platen needs to be adjusted.
DIAGNOSIS Look at your printer manual and find where it describes how to move the print head closer to the platen. if the print is still light after moving the head closer, then the pins on the head may be worn.
lf your manual does not describe how to purchase and replace the print
head, call some computer repair shops and ask if they can help you. Otherwise,
you may have to contact the manufacturer for service.
Some dots or a line of dots is missing from my printouts.
CAUSE A pin on the print head may be damaged or worn, you may have the wrong printer driver installed, or the ribbon may be slack.
DIAGNOSIS If a consistent horizontal white line appears on your printed text, the head is damaged. If a white line appears when you print graphics, but not when you print text, then the problem is with your printer driver. If a random scattering of dots or short horizontal lines are missing from your text, then the ribbon is slack, causing it to get caught in the print head.
CURE To replace the
print head, see the previous answer. If the problem is with a printer driver,
see the printing graphics problem above. If the ribbon is slack, there
is probably a knob that can tighten it. As usual. consult your printer
manual!
ASK DOCTOR
JOYSTICK'
Every time I try to play that award-winning game, Brak The Barbarian Versus The Yuppie Investment Banker, my joystick stops working.
CAUSE Brak's programmer chose to read the joystick from the mouse port (Port 0) instead of the more commonly used joystick port (Port 1).
DIAGNOSIS The joystick works fine with every other program you own.
CURE The next time
you use the that particular program, unplug your mouse and stick the joystick
in its place.
My joystick won't work with any program.
CAUSE It's broken.
DIAGNOSIS Usually one of two things on a joystick breaks: the cord or the switch. Using a screwdriver, take apart the joystick. (With some joysticks, watch for springs falling out. They're easily lost.)
Visually check the switch. The way the less expensive joysticks (like Atari's) work is by pushing a flat plastic circle, held perpendicular to the actual joystick, against bubble contacts inside the base. If the stick is used aggressively, this fairly fragile circle can break. Inspect it for cracks.
If you have a more expensive stick (one that makes a definite "click" sound when pushed), your joystick uses microswitches to send signals. Push the joystick in every direction and listen carefully for the telltale click. Also make sure the joystick rebounds into the neutral position.
If the switch is intact, check the cord. Using a resistence meter, measure the resistence along the length of the cord, from the computer plug to the joystick switch. Visually check the exposed wiring for fraying or breaking.
CURE The easiest thing to do is just buy a new joystick. But, if you insist...
If your joystick uses Atari's bubble-contact arrangement, slide the plastic circle out of the rubber housing and glue it back together.
If your joystick uses microswitches, take it to an electronics store and try to find a replacement switch. Look for the same brand, if possible. You may not be able to find a replacement or substitute for every microswitch. If you do find one, you'll need to solder it into place.
If the exposed wiring within the base is frayed or broken, you can trim
the damaged ends and solder a bridge between them. If the problem is in
the long, insulated cord, you're stuck with buying a new joystick.
When I play that award-winning game, Son Of Brak The Barbarian Versus The S&L Loan Officer, I can only move Brak in certain directions, but the manual says he can move in any direction.
CAUSE Definitely a broken joystick switch.
DIAGNOSIS See the answer above.
CURE See the answer
above.
ASK DOCTOR
MODEM
My modem won't work.
CAUSE Something's amiss. It could be a bad cable or a broken modem.
DIAGNOSIS Make sure the modem has power, and that it's connected to the ST. Most modems have a row of lights labeled HS, AA, CD, RD, SD, TR and MR. When they're lit, they represent activity on some of the modem's data lines. When you turn your modem on, you should see that TR and MR are lit up. TR means Terminal Ready; it indicates that your ST is communicating with the modem. If it doesn't light up, you might have a bad cable; borrow another cable and see if the modem works with that. MR means Modem Ready. If it's not lit, then something is wrong with the modem. Finally, make sure that the cord connecting the modem to the phone jack is okay. Plug a phone into it and see if you get a dial tone, and if you can dial a number.
CURE If the cable is bad, be sure that you purchase the correct kind of replacement cable! Bring the bad one with you so that you can compare the connectors. Be careful not to buy a null-modem cable or adaptor. A null-modem is used to connect your ST directly to another computer; it isn't designed to talk to a modem.
Unfortunately, there isn't much you can do to fix a broken modem, unless it's a burned-out fuse. Sec if your manual tells you how to replace a fuse. If it does, do it, if not, you might want to take the modem apart to see if it has a fuse, and replace it if necessary - but only if it's no longer under warranty. If the fuse looks fine, then one of the chips may be bad. You'll have to send it back to the manufacturer for repairs.
If the phone cord is bad, try replacing it. If it's still bad, then
there's a problem with the outside line, and you should report it to your
phone company.
When I'm connected to some BBSs, the stuff that I type doesn't show up on the screen. On other BBSs, everything I type appears twice, lliikkee tthhiiss.. What's wrong?
CAUSE Your terminal is set at the wrong duplex (also known as echo mode).
DIAGNOSIS Duplex refers to whether or not your terminal echoes what you type on the screen. Some BBSs send what you type hack to your terminal, other BBSs expect you to provide your own echo.
CURE Somewhere in
your communications program there should be a way to switch the duplex.
If you can't see what you type, turn your echo on by selecting half duplex
(local echo). If you see two characters for every one you type, switch
to full duplex (no echo).
A lot of garbage characters appear on my terminal screen when I am connected to a BBS. I*5t IooH@12s s &mthing liKe NM*&is.sd
CAUSE Line noise caused by electrical interference.
DIAGNOSIS AND CURE Line noise can be difficult to track down, especially if it's intermittent. If the noise only occurs when you call a certain BBS, tell the sysop of that BBS about the problem. If it seems to strike at random, make sure that your modem and phone cord are placed at least six inches away from your monitor, or any other electrical equipment which might be a source of interference. The further away, the better. If that doesn't help, turn off your computer, plug a phone into your phone line, and listen for a loud crackling or popping sound. If you hear some, report the noise to your phone company.
If you live in an area with a large concentration of TVs and stereos
(an apartment complex or a college dorm), or if you live close to a TV
or radio station, you should buy and use a shielded modem cable. Make sure
your equipment is plugged into a grounded three-plug wall socket. This
not only reduces line noise, but may also protect your system from a chip-scaring
jolt! You can never eliminate line noise, but this should bring it down
to an acceptable level.
ASK DOCTOR
MIDI
The software is sending MIDI data but I'm not getting any response from my instruments.
CAUSE Either the software is sending non-note data, the MIDI cables are not connected properly, or your MIDI channels are not matched.
DIAGNOSIS AND CURE Just because the software shows it is sending MIDI data doesn't mean you will hear sounds. It is possible the program is just sending controller or system information and not any notes. Double check that there really is a problem before troubleshooting it.
If you're satisfied that the program is sending notes, check the MIDI cable connections. For a simple setup, one cable should run from the Atari MIDI Out to the instrument MIDI In and a second cable should run from the instrument MIDI Out to the Atari MIDI In. If your instruments are chained from one to another, the cables run from the MIDI Thru of the first instrument to the MIDI In of the second instrument, then from the MIDI Thru of the second instrument, to the MIDI In of the third instrument. etc. For complex setups with a MIDI patch bay, be sure that the MIDI In and Out connections are plugged in correctly and that the expected patch program is in use. Incoming MIDI data may contain program changes that trigger a MIDI patch bay to inadvertently reroute your system connections.
If your cables are correct, then check that your instruments are set
to receive on the MIDI channel on which your software is sending. If you
don't know which channel that is, vary the instrument receiving channel
while the software runs and you should eventually hit it. For a fast check,
putting the instrument into Omni mode (if it is capable) makes it respond
to any incoming MIDI data, regardless of channel. If there is still no
sound even in Omni mode, the problem comes from other cause(s).
The instruments are playing but the results are garbled.
CAUSE You're using non-standard MIDI cables.
DIAGNOSIS The Atari MIDI-Out port incorporates active MIDI-Thru connections (violating the normal MIDI specification). Standard MIDI cables will not pick up this extraneous MIDI-Thru signal, causing your music to play correctly. Other cables may look like MIDI cables but are designed for other uses and have internal connections that can pass corrupted MIDI data. Unfortunately, there's no way to tell visually how a cable is wired internally.
CURE Make sure you
buy regulation MIDI cables. Don't just buy a cable which has a five-pin
DIN plug; buy one designed for MIDI data.
My friend and I want to play two keyboards at once into my sequencer. I tried to connect them with a V-cable and feed it into the Atari MIDI In, but the result is garbled.
CAUSE Incompatible MIDI data stream.
DIAGNOSIS A single MIDI command, such as turning on a note, is actually made up of several separate data bytes in series. A Y-cable would let the merged data streams cut into and interfere with each other in strange and ugly fashions. That's why your music sounds garbled.
CURE What you need
is a dedicated MIDI merge unit that intelligently recognizes individual
messages coming in and splices them together in a single coherent stream.
Such devices are available as stand-alone units or incorporated into some
keyboards and third-party Atari MIDI interfaces.
I downloaded a Macintosh sample data file that should be compatible with my sample-editor program, but it could not be read.
CAUSE The MacBinary file header was not deleted.
DIAGNOSIS Some types of MIDI data files are compatible across computers (e.g. samples. patch banks, standard MIDI format sequences). While Atari and IBM files are readily swapped, many downloaded Macintosh files contain an extraneous 128 byte header (MacBinary header).
CURE You can use any
binary-editor program to delete this header (try Byte Mechanic from START
Special Issue Four) and resave the file. Loading it into your word processor
for editing is not recommended.
When I record into a sequencer, I hear only half the notes that the instrument is supposed to be able to play.
CAUSE MIDI Local Control is still on.
DIAGNOSIS Keyboard instruments have two parts: the keyboard controller and the synth sound generator. Normally, you want the two linked so that pressing a key produces a sound. When the instrument is hooked into a sequencer, however, notes are played twice: first, as you press the key, and again as it echoes through the sequencer. Each note is using two MIDI channels, instead of one. As a result, you only hear half as many notes as your keyboard could produce.
CURE Within the MIDI
specification is a Local Control MIDI command which breaks the controller/generator
link. Not all MIDI instruments implement it. If yours does, switch Local
Control to off. Now pressing a key sends the signal straight into the sequencer
without making a sound. The sound generator only responds to MIDI data
sent back from the sequencer.
I have trouble sending new patch banks into a synthesizer.
CAUSE Again, there arc several possible causes: synth memory protect is on, you need two-way MIDI communications, or you've chosen the wrong patch-file format.
DIAGNOSIS AND CURE Synth memory protect may be on by default, because some synths start in this mode when they are turned on. If memory protection is active the synth will not accept new patch data. There is usually some sort of front-panel control (see your synth manual) which you must set to turn off protection.
While most synths only need one-way MIDI linkage (Atari MIDI Out to synth MIDI In) to receive new patch data, some demand two-way communications (Atari MIDI Out to synth MIDI In and synth MIDI Out to Atari MIDI In). The Casio CZ-l0l series is a notorious example. To be on the safe side, always try to keep a two-way communications link.
If you suspect the patch-file format, you have good cause. Patch-editor
programs tend to use proprietary file formats to store patch data. In general,
patch files created by one program cannot be used in another program even
though both are working with the same target instrument. Similarly, you
cannot use patch files created for one instrument with another (e.g. send
CZ-10l patch file into a DX7). If you run into this prob1cm, you're out
of luck. You can't use the patch.
When playing a sequence, the drum part uses the wrong sounds, like whistles instead of the expected hi-hats.
CAUSE The original drum part was recorded with a different instrument.
DIAGNOSIS MIDI instruments have different drum sounds mapped to individual keys. For example, C2 plays snare on one instrument, but D2 plays it on another. If a sequence was recorded using a Yamaha RX-11 drum machine and you play it through a Roland R-8, the drum part will sound quite different from the original.
CURE Many sequencers provide some form of a drummap editor, which changes the drum sound to note assignment. The alternative is to change the map within your drum machine.