PULL-DOWN MENUS
By Marc Abramowitz
Your Atari gets to use one of the most popular techniques in modern software--pull-down menues!
This short demonstration program clearly explains how BASIC programmers can use pull-down menus in their own programs. This BASIC program works on all 8-bit Atari computers with at least 48K memory and disk drive.
Much of the new software written for the IBM, Atari ST, and other business computers is now using something called pull-down menus, or drop-down menus. This technique is probably the best menu interface system for speed and ease of use!
This type of system is fairly simple to use. The choices for the main menu are displayed horizontally on a bar at the top of the screen. The user can highlight one of the choices with the keyboard, joystick or mouse. Pressing a button generally causes a sub-menu to be "pulled" out from the top pf the screen. Choices may be made on that menu by highlighting a selection and then pressing (or releasing) a button. Or the user can move the cursor back to the main menu at the top, or move over and see the sub-menu of another choice.
Different computers and programs may use slightly different systems, but all of them offer the advantage of being able to see the sub-menu of a menu choice without selecting it. In a conventional program, you would have to make a selection, see that you don't want one of the selections on the sub-menu, press a key to get back to the main menu, and try the other selections. A pull-down menu system makes it far easier to find what you're looking for, particularly if there are many menus within menus.
I decided to try writing my own pull-down menus for my 8-bit Atari and the result is Pull-Down Menus, an example of the use of these menus in a simple, fake drawing program. This is not a working graphics program, but rather a demo of subroutines you can easily put into your own programs. Now you can include pull-down menus in your BASIC programs with very little work!
GETTING STARTED
Type in PULLDOWN.BAS, Listing 1, check it with TYPO II and SAVE a copy to disk before you RUN it.
If you have trouble typing the special characters in line 470, don't type them in. Instead, type in Listing 2. When Run, this program creates these hard-to-type lines and stores them in a file called LINES.LST. To merge the two programs, type NEW, then LOAD "D:PULLDOWN.BAS", Listing 1, and then ENTER"D:LINES.LST." Be sure to SAVE the completed program.
PULLING MENUS
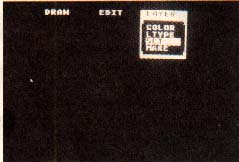
When you RUN Pull-Down Menus, you will see the words DRAW, EDIT and LAYER at the top of your screen. Using a joystick or your cursor keys, you can move the highlighted bar left and right, from one word to another. Press the joystick trigger or [DOWN ARROW] without [CONTROL] to pull down a submenu. (Be careful to only press the joystick trigger once.)
Pressing [ESC] while in a submenu will return you to the top menu. Moving left or right while in a submenu will move you to the next submenu.
Pull-Down Menus in action
Highlight your choice in the submenu, and select it with the joystick trigger or [RETURN]. Since this is strictly a demo, the program will simply write the name of your choice on the screen. Press the joystick trigger or [RETURN] to try it youlve seen how pulldown menus work, you should be ready to try putting pull-down menus into your own programs. To make it easier for you to use these subroutines, I've included a list of variables and some comments on the program's structure.
VARIABLES
B - Background color; change to any number you wish from 0-255
T - Brightness of text; use values from 0-14; 14 for brightest
A$ - A string used for handling the highlighting bar; do not change
M$ - A string used for storage of menu data; can be changed
N - Number of items in the current menu
XM - Horizontal position of menu
FL, FL2 - Flags
A, Y2 - Used to find specific menu items in A$ or M$
ST, TR, K - Joystick, trigger, and keyboard
X, Y - Horizontal & vertical location of highlighting bar
I - used for loop in 310-320
INV - location of ML routine that inverts text
CUSTOMIZING
To customize this program for your own use:
1. Change B and T to whatever color values you wish.
2. Store menu items in M$. Each item must be nine characters long, so shorter items should be padded with spaces. You may add the spaces before or after the item.
3. After each M$"...." command, you must put the number of items in the menu in N and the horizontal location in XM. You may want to center top menus, while aligning submenus under their main menu choices, as I did.
4. GOSUB 180 (top menu) or GOSUB 300 (sub-menu)
5. If you want more or less than three items in the top menu, you will have to add or delete lines in lines 130-150.
The program is relatively simple, so it should be easy to modify to fit your needs. My machine language routine at the end has numerous uses outside this program. The format for the USR command is:
DUMMY=USR(INV,ADR,NUM)
Here ADR is the address of the string or memory locations to be inverted and NUM is the number of consecutive bytes to invert. This routine will not invert [CONTROL] characters, etc. All it does is add 128 to all specified bytes.
PROGRAM BREAKDOWN
100-110 = Setup and jump to 470 to read in ML routine
120 = Data for main menu; jump to 180
130-160 = Read In data for appropriate sub-menu based on menu selection and then jump to 300
170-174 = Print final choice, wait for [RETURN] or joystick trigger press to RUN program again
175-280 = Draw main menu and handle selection
290-450 = Draw and handle submenus 460-470 = ML invert text routine
Marc Abramowitz lives in Staten Island, NY. His game, Red Squares, appeared in the July, 1989 issue of Antic.
Listing: PULLDOWN.BAS Download