Detecting Loading Problems And Correcting Alignment On Your PET
Dan Isaacson
Loading
When you load a program into your PET do you ?PEEK(630),ST?
As you know, when you RUN an incompletely loaded program your PET will crash, forcing you to turn it off and power up again. When you are loading a program for copying it would be nice to know that you've made a copy of the complete program—one with no dropped bits.
The PET recording system uses a dual redundant method. Programs are recorded twice on cassette—a block of data followed by an identical block, followed by a block of different data, followed by a block identical to that data, etc.
DATA BLOCK 1 DATA BLOCK 1
DATA BLOCK 2 DATA BLOCK 2
In LOADing a tape, the computer compares the two blocks, bit for bit, and stores in location 630 a count of unmatched (or not identical) bits in the two blocks. After a program LOADs, if you
?PEEK(630),ST
0            0
will be returned if there were no bits dropped and if the STatus bit was read properly at the end of the LOAD, thus informing the computer of a satisfactory load. As long as location 630 has a 4 or less stored in it you have a satisfactory load which can be copied with confidence.
Tape-reading problems
Location 630 also can tell you if you have a head alignment problem—and, incidentally, can help you to re-align your tape head without sending it back to your supplier.
If your PET is not loading properly, LOAD several tapes and ?PEEK(630). If all the tapes give non-zero responses either your tape head is out of alignment or the recording level is too low on all of them. Low recording level is not a problem with PET recordings as it may be with the TRS-80. "Low" level usually comes from a blank tape which you thought was recorded on, from a tape which got too near a source of magnetism and was partially or wholly erased, or from a tape which got too near a source of magnetism and was partially or or wholly erased, or from a tape which has been twisted in the cassette and which now has its non-magnetic side facing outward.
It's easy to test volume level of a suspect tape on an audio tape recorder against a tape that works. You can hear the volume difference easily. The odds are very low, however, that more than one tape in a group has a low recording level.
Field-alignment
To field-align your cassette head you will need a thin, Phillips-head screwdriver and several commercially produced tapes with which to verify tape-head alignment. The strategy I'll describe (before I tell you where to find the screw) is to:
- LOAD a tape
- ?PEEK(630),ST
- Write down the result of (2)
- If the result is not both zeros, turn the head-adjusting screw slightly counter-clockwise (about 1 minute on a clock, or about 6 to 10 degrees).
- Write down which way you turned the screw (clock-wise or counter-clockwise).
- Do steps 1 through 3 again.
- If your PEEK gives a higher number of dropped bits then you turned your Phillips-head screwdriver the wrong way.
- Turn the screwdriver in small increments, repeating steps 1 through 3 until PEEK gives you 0 0.
- Finally, LOAD 3 or 4 commercial and also locally-made tapes to make sure the results are always 0 0. Your tape head is then aligned to read the tapes you need to read.
CAUTION: To take the slack out of the adjusting screw when turning it clockwise, first turn the screwdriver clockwise slightly past the position you want and then turn it counter-clockwise back to the position you want to end at.
Although the alignment procedure described takes time, it should be possible for any handy youngster following these directions to do a satisfactory job.
Where is the adjustment screw?
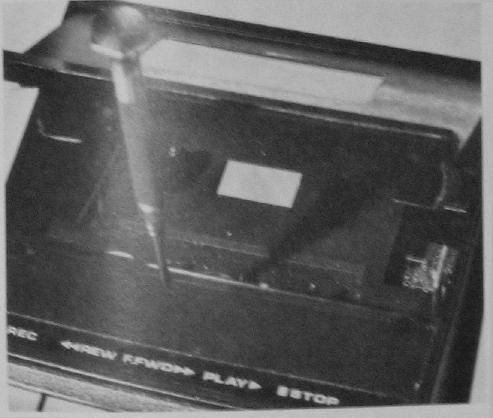
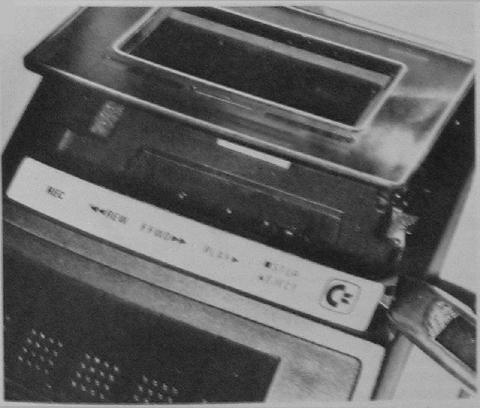
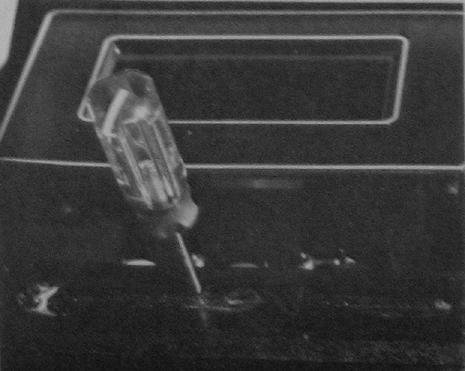
The PET has been delivered with two different models of tape recorders: one has a cover you lift by hand (see Figure 1), the other has a push-button-eject cover (Figures 2 and 3). The location of the adjusting screw for each is shown in the photos.
To get at these screws, the PLAY button must be depressed. The power may be present or off during adjustment, but the PLAY button must be depressed so the screw moves to a position under the hole where you insert your screwdriver.
Once you've found the screw, go back to follow the instructions in the field-alignment section.


