REVIEWS
KoalaPad For PCjr
Lee Noel, Assistant Editor, Art & Design
Requirements: IBM PCjr with 128K RAM, disk drive, DOS 2.1, and color display.
Long before I picked up the new PCjr KoalaPad, I was using the KoalaPad for the Commodore 64. In combination with its accompanying KoalaPainter program, it was—and still is—the most flexible and satisfying computer graphics tool I've ever used.
After testing the PCjr KoalaPad package for more than a month, I'm pleased to report that it's virtually identical to the Commodore 64 version. The essential features have all been retained, and the few differences are improvements.
A Screen In Your Lap
The KoalaPad is compact: about six by eight inches overall, with a pressure-sensitive drawing surface about four inches square. There are two large black buttons at the top. It's sturdily constructed of plastic and should withstand moderate abuse from children.
The KoalaPad plugs into one of the joystick ports on the rear of the PCjr with a 5-1/2 foot cord, and it works on the same principle as a game controller. But instead of reporting the position of a movable joystick, the KoalaPad reads the position of an object pressing against the pressure-sensitive membrane. (This can be the plastic stylus supplied with the package or even a finger.)
The program running in the computer then converts this input into some meaningful form. Not unexpectedly, the two buttons at the top of the pad act like fire buttons on a joystick. Unlike the joystick buttons, though, both buttons on the pad do exactly the same thing, so it never matters which one you press. Two buttons make the pad convenient for both left- or right-handed people.
It's up to the program to make use of the pad's readings. You could write your own programs to work with the KoalaPad, or even use it with some existing software. Of course, the pad comes with its own graphics program, KoalaPainter. It treats the pressure-sensitive surface as a representation of the computer's display screen. Pressing a certain point on the pad's surface causes a lighted arrow to appear at a corresponding point on the screen. Moving across the surface as you press also moves the arrow across the screen. Removing all pressure from the pad makes the arrow disappear. In computer jargon, the arrow is a cursor.
However, pressing two or more places at once does not make two arrows appear onscreen. The KoalaPad is designed to recognize only one contact at a time; more merely confuse it. Therefore, you have to keep stray fingers off the membrane. (This is a major difference between the KoalaPad and a competitive touch tablet, the PowerPad from Chalkboard, which can distinguish multiple contact points and report them all to the computer.)
The KoalaPad is easiest to use with its special stylus. The stylus moves smoothly across the surface and greatly aids accurate work. However, just about anything can be used as a stylus. Children often prefer just to press with a finger, in a fashion similar to fingerpainting. But even though the membrane is very durable, you should avoid sharp objects that might permanently damage it.
Easy To Run
Before using the KoalaPainter diskette for the first time, you must transfer parts of DOS 2.1 onto it. The procedure is very well explained in the manual, even for beginners. Once it's done, you'll never have to do it again; you boot up with this disk each time.
All you have to do is plug the pad into the rightmost (as you face the system unit) joystick port, then insert the prepared disk and turn on the computer. Everything runs automatically.
The KoalaPainter menu denotes various functions with tiny pictures on the screen, sometimes called icons. Even nonreaders can use this program. The menu is well-designed and extremely easy to understand. For example, a picture of two circles indicates the CIRCLE function, which lets you draw circles. It's that simple.
To activate the CIRCLE function—or any similar option—you just move the stylus across the pad so the screen arrow points inside the box containing the appropriate icon. Then press either of the KoalaPad's fire buttons. At once, the box changes color, verifying your choice. The function remains active until you select another one.
Of course, you don't want to draw pictures over the menu, so the program has a blank screen ready. To reach it, stop pressing against the pad and press one of the buttons. Instantly, the blank screen appears. You can return to the menu anytime by removing pressure and pressing the button again. That's basically all there is to operating the system.
The KoalaPad system shows how easy computers can be. There's rarely a need to touch the keyboard, and there's no mysterious new computer language to learn. Naturally, taking advantage of KoalaPainter's many functions to create a detailed picture does take some practice, but you can start experimenting immediately. Thanks to the excellent manual (despite a few typographical errors), the task of learning the program is simplified considerably.
Low-Resolution Graphics
For some reason, KoalaPainter only uses the PCjr's low-resolution 160 X 200 pixel graphics mode (SCREEN 3 in Cartridge BASIC). This mode does offer 16 simultaneous colors, but so does one of the medium-resolution (320 X 200) modes. The greater the resolution, the more detailed the pictures you can draw.
Koala Technologies says it chose low-resolution graphics to conserve memory and to insure a clear display on ordinary TV sets and composite color monitors. While the latter point makes some sense—TVs may indeed have difficulty with the finer display—it's hard to understand why memory was a factor. The PCjr version of KoalaPainter requires 128K RAM, more than enough memory to support all the requirements of the program. The Commodore version runs easily in 64K, and similar programs for other computers can run in as little as 16K. Koala says the decision to use the low-resolution mode was a judgment call, but it seems a shame that KoalaPainter cannot take full advantage of the PCjr's excellent display capabilities.
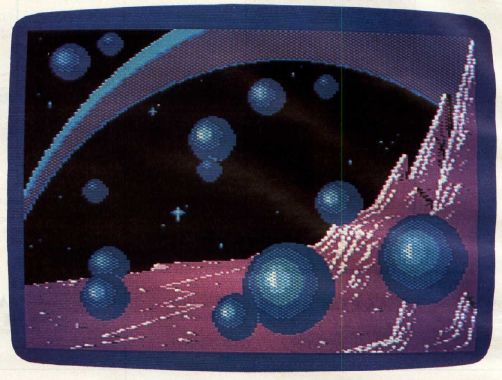
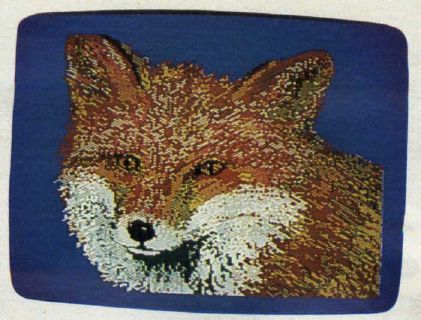
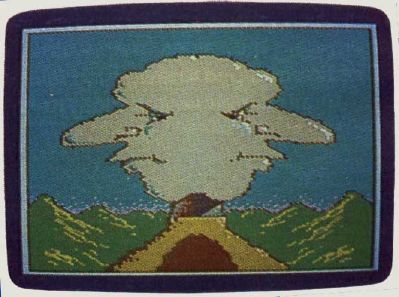
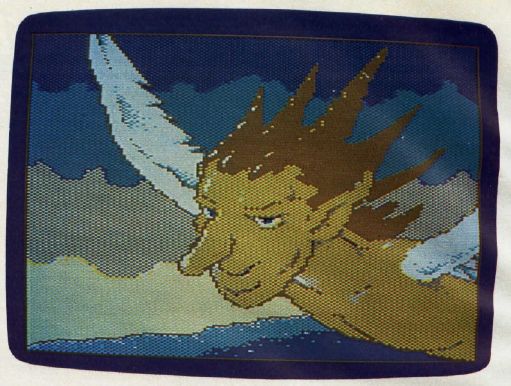
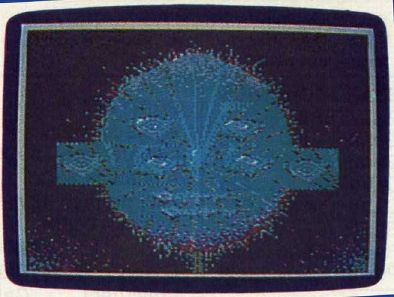
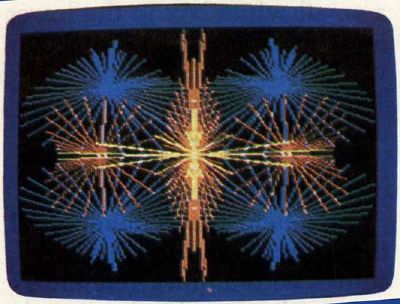
Of course, a lot can be done even with 160 × 200 graphics, as the accompanying screen photos prove. The picture of the fox, one of several demos on the KoalaPainter disk, contains plenty of detail. And the resolution is comparable to that offered by competing graphics packages for other home computers.
Still, it would be nice to have the highest full-color resolution the PCjr can support. Perhaps some RAM could be conserved if Koala supplied
KoalaPainter on ROM cartridge instead of disk. That would, however, increase production costs, and therefore the retail price. As Koala says, it's a judgment call.
A Hundred Shades
You can actually simulate more than 16 colors with Koala-Painter. Although the PCjr is limited to displaying only 16 true colors—or, more accurately, two shades of eight colors—you can mix any two colors into a halftone dot pattern. This creates the effect of different shades. Further, there's a special new rainbow color feature that mixes lots of colors together for you—children should love this. All in all, there are more than a hundred shades and combinations to choose from.
The border on the drawing screen changes to match the drawing color selected. Otherwise, it's easy to try to draw in, say, white on a white background. Without the border, you might wonder for a long time why nothing was happening. However, the border can display only a single solid color—not the rainbow color or the halftones.
In addition to all the colors, KoalaPainter gives you eight different types of brushes. You can use a fine brush for drawing, a broad brush for rapid painting, a brush that makes several parallel lines, a brush that letters in italics, and more. Of course, the brushes are just a software illusion—you always use the same stylus or fingertip.
Drawing Options
Once you've selected your color and brush, you choose one of the drawing commands from the menu. There's everything from a freehand drawing mode to a Zoom command that magnifies a section of your picture so you can make precise changes to any dot of color on the screen. Here's a summary of KoalaPainter drawing options:
•Line, Lines, and Rays let you draw perfectly straight lines in various ways. They use a technique called rubber-banding. First, you set an initial point by pressing the stylus against the pad and hitting the button. Then, maintaining pressure, you move the stylus. On the screen, you'll see a flashing line stretching back to the original point from the current stylus position. As you continue to move the stylus, the line moves to accommodate the new position. This looks a lot like a rubber band being stretched over the screen, hence the term.
When you're happy with the length and direction of your line, you press the button a second time. Then you can move the line (now of fixed length and direction) to any area of the screen. Pressing the button a third time locks the line in place. If you wish, you can continue putting identical lines all over the screen just by pressing the button repeatedly.
- Frame, Box, Circle, and Disk draw just what you'd expect. (A box is a solid frame and a disk is a solid circle.)
- Mirror lets you draw symmetrically in three different ways. For example, one of the mirror modes produces a topbottom mirror image—anything you draw in the top half of the screen appears simultaneously, but inverted, at the bottom of the screen, and vice versa. You could draw a reflection in a pond or some other flat, shiny surface with about half the effort you might otherwise expect.
- Fill is another readily grasped command. If you've got a child who loves coloring books but is frustrated by not being able to color pictures evenly, Fill will come as a blessing. (They can't draw on walls with it, either.) You can fill any completely closed outline with any color. Using it is really child's play: Select the Fill command and a color from the menu, move to the picture screen, put the cursor inside the closed outline, and press the button.
The KoalaPainter Fill command is not only fast, but also the most thorough I've seen in any graphics package. While Fill (sometimes called Paint) commands are common to lots of graphics programs, they are sometimes fooled by complex outlines and fail to fill them completely. With KoalaPainter, as long as the outline is fully closed and the fill color doesn't conflict with the background color, Fill works flawlessly.
There are limitations, though. Remember that Fill actually "looks" for the border around the space it's supposed to fill. So you can't refill an area already filled with a halftone, for example; every point in a halftone pattern is surrounded by four others in a contrasting color. However, there are ways to get around this (see below).
- Copy lets you select a portion of your picture and transfer it anywhere on screen. You can draw a detail once and use it over and over again.
- Swap lets you flip between two drawing screens, completely independent of each other. Apart from the obvious fun of working on two pictures fun of working on two pictures at once there are a couple of interesting applications that come to mind for this command. For one thing, you could reserve one screen for your picture, keeping the other as a work area where you create details for the main picture. Once the details are complete, the Swap and Copy commands can transfer the images from the work screen to the main screen. You can test and perfect certain elements of your picture before committing them to the main screen.
I've used some expensive graphics software that makes a big deal out of allowing you to create individual picture/detail libraries for various purposes.KoalaPainter provides the same capability with Swap and Copy, especially with Swap and Copy, especially when used with the Zoom and Mirror modes.
Another (as yet untested) application for Swap is cartoon-like animation. You could copy an entire picture from one screen to the other, making the slight changes required to produce the illusion of movement. This process could be repeated until the desired sequence was completed. The resulting frames could be filmed or videotaped.
Oops-Proof
- The Erase command blanks out a hopelessly botched screen, but only the one you were looking at most recently. The second screen is safe and can be reached with the Swap command.
- Oops fixes your minor mistakes. It nullifies the effect of your last menu selection. This is a very useful feature, and it's missing from lots of graphics software. Let's say you want to test a certain fill color in part of your picture. Just go ahead. If you don't like the way it looks, immediately go back to the menu and select Oops. The picture is restored exactly as it was before. But you have to use Oops immediately. If you fill, then select Draw, and suddenly decide you don't like the fill color, Oops can't rescue you. It would work only on the more recent Draw selection.
By the way, this is one method of remedying an unsatisfactory halftone fill. You just use Oops and try again with a different color.
- X-Color may seem a little weird at first, but it's a command I use a great deal. Amazingly, it will change all areas of a certain color in your picture to any other color. This is possible because the PCjr is the only home computer besides the Atari that has a color-indirection system (although this feature can be simulated in software on other computers, as KoalaPainter does on the Commodore 64). Let's say you suddenly realize outer space isn't really black, it's purple. Just select X-Color and purple, go to the picture screen, place the cursor on any black area of the picture, and all the black turns purple. (That's all the black, so if something should have remained black, it's time to use Oops!)
X-Color can also extricate you from a halftone fill problem, especially if Oops won't work. You just use X-Color to make one of the tone colors the same as the other. Then you've got a solid color which can be filled in the normal way.
- Storage lets you name, save, and recall your pictures with the disk drive. It calls up a special disk menu which requires elementary reading skills. Picture files must be named and typed in on the keyboard. Parents may need to help young children at this point.
Jittery Drawing
- The Draw option lets you draw freehand, just like you would with a pen or brush. Marks appear on the screen only when the pad button is pressed. This mode ought to be simple and straightforward, but it's not.
First, the cursor is always jiggling around with KoalaPainter. It's almost impossible to draw a smooth line with Draw. Instead, Draw makes a spontaneous, lively line. This is fun for some purposes, but frustrating for others. When rigid control is required, you must switch to one of the precise drawing commands, such as Line.
More importantly, there is a relatively minor but annoying bug in the KoalaPad system. The pad keeps track of the stylus's position by constantly comparing it with a theoretical pressure point at the upper-left corner of the pad. Sometimes, mostly when using the Draw command, if your stylus pressure is a little light, the pad suddenly decides it's you up there in the left-hand corner. Consequently, a line instantly splashes up to that corner of the screen. If this happens, go straight to Oops, unless you've drawn a great deal since the last menu selection. If that's the case, it's better to choose a thick brush and erase the pesky line by painting over it with the background color.
Be alert for this problem. It's built-in, but won't be a danger unless you forget what's happening.
- Zoom is the ultimate command for the detail-minded. When you select Zoom, a small rectangle appears on your drawing screen. It can be moved to any area of your picture that needs close inspection or detailed revision. Then press the button. You'll see not only a greatly enlarged view of the area under the rectangle, but also a normal-sized view of that general part of the screen. A special palette display lets you change colors without going to the menu. You can use the magnified cursor to change any of the individual dots of color that make up your picture. The changes appear instantly in the normal-sized section of the picture. The only KoalaPainter command supported in Zoom is Draw. This means you are pretty well restricted to changing just one block of color at a time.
Other graphics packages offer Zoom commands that support more complex drawing functions, but you usually can't even tell what you're looking at unless you call back the main picture screen. The KoalaPad Zoom is far superior to any other I've seen or used.
Art Or Doodling?
As an instrument for creating art and graphics, the KoalaPad and KoalaPainter are a boon to the serious designer as well as the computer doodler.
While personal computers are now widely recognized for their serious financial and communications applications, there seems to be some reluctance to acknowledge them as a viable medium for the graphic arts. Artists who make full use of the power of the KoalaPad system may help turn this around.
It would also help if KoalaPainter provided a way to make hardcopy printouts of its screen displays. At the moment, you can permanently save your creations only by storing them on disk, recording them on videotape, or photographing them off the screen. Maybe someday a good programmer will write a utility to dump the images to a color printer.
There will always be skeptics who think the home computer is, at best, an art toy. After all, what do those dots of color on a TV screen have to do with real art? But traditional artists have created great works using similar techniques. One example is Georges Seurat (1859–1891), the famous French artist and champion of the Neo-Impressionist movement. His significant contribution was largely based on a system of isolated dots of color used to build up entire paintings. Although his unfortunately brief working life spanned a number of years, Seurat's demanding, precise technique limited his lifelong output to seven major paintings. I suspect that Georges Seurat might have been very interested in the efficient and powerful KoalaPad and KoalaPainter.
KoalaPad
Koala Technologies Corporation
3100 Patrick Henry Drive
Santa Clara, CA 95052-8100
$124.95