
In the two previous Wild Fontier articles, I talked about how to design or modify fonts, and how to do double column printing. Now I'd like to let you know just exactly what features that DD3 has, how to implement those features, what problems you are likely to encounter, and how to deal with those problems.
The first thing to remember is that the backslash is DD3's delimiter. That is, DD3 recognizes the backslash as a signal that a formatting command is following. As an example, the \J command is the justification toggle. Even though \J consists of 2 characters, they will not be printed and will not figure into the spacing. The same is true with any DD3 command. Now, let's go through DD3's features.
Hard Choices
DD3 gives you the option of having a hard space if you want. This is when you have a space between two words, and you don't want them to be on separate lines. You simply insert a hard space between two words and the two words will be treated as one, but there will still be a space between them when printed out. Whenever you want a hard space, simply insert a backslash before each space that you want to be a hard one. DD3 also allows hard hyphens. DD3 automatically uses soft hyphens. If you have a hyphenated word in your text, such as "Daisy-Dot", and the hyphen just happens to be right on the margin, DD3 automatically breaks the word into two parts at the hyphen if both will not fit on the line. If you do NOT want the words broken up, then you must use a hard hyphen. Just as in the case of the hard space, simply insert a backslash before every hyphen you wish to be a hard one.
All Mixed Up
DD3 will allow you to mix fonts on the same line:

To do this, simply use the change font command, \F followed by the name of the font, and then type another backslash after the last letter in the font name. The font change command is the only DD3 command that requires two backslashes, the first one, in the \F, the second one at the end of the font name. Here is what the above example actually looked like as it was typed in the text file:
\Fplain\Atari \Fcentury\Classics \Fswiss\Magazine\Fplain\
Of course, the mixing of fonts looks best if the fonts are all the same height. The font change command is legal anywhere.
Manipulating Text
DD3 allows text to be block left, block right, or centered. The respective commands are \L, \R or \C. All three of the block commands are legal anywhere. There is one thing to remember about the centering command. The text is centered according to the total width of the page as it was set during the customization of DD3 when you first run DD3. There is no easy way to change this. Actually, there is NO way to change it, but there is a rather complicated way to simulate the \C command by using the tabs, but I'll cover that when I get to the tabs. The justification command mentioned earlier, \J, is legal after a hard RETURN, or it can be anywhere in the first line of a file before the first character to be printed as text on that line. Another rather simple command is the underline command, \U. Like the justification command, the underline command is a toggle. Unlike the justification command, it is legal anywhere.
Another command is the width command, \W. This command will take whatever text you are printing and change the width. DD3 expects a number, 1 through 4, after the \W. Here is a small sample of what it will do:

Here is the text for the above example:
\WlDave \W2Dave \W3Dave \W4Dave
The width command is legal anywhere.
Another command is the character spacing command. This command changes the number of blank dot-columns printed between characters. After the character spacing command, \S, DD3 expects to find one more character to determine the amount of spacing. This character is either a number, 0 through 9, or, if you want a higher value than 9, use the letters A through J for the values of 10 through 19. Here is a sample of what you can do with the spacing command:

Here is the text for the above example:
\S0a\S1b\S2c\S3d\S4e\S5f\S6g\S7h\S8i\S9j\SAk\SB1\SCm\SDn
The character spacing command is legal anywhere.
Yet another command is the graphic density command. If your printer supports different densities, then use this command, \D. After the \D, DD3 expects to find either a D, L, or H, which stand for draft, low, or high. Here is an example of each:

The density command is legal in a new line after a hard RETURN, or in the first line of a file, before the first character to be printed as text on that line.
One thing to remember about the density command is that if the density is set at high, it will not work if your printed page width is more than 6", or, to put it another way, the left margin and the right margin added together must be at least 2 inches. The only reason the column you are now reading is in high density even though the margins add up to less than 2 inches, is because if you recall the Wild Fontier article from the last issue dealing with double column printing, each column is in reality a separate page, thereby making it possible to create the illusion of a wider page. Speaking of margins, the command for setting the left and right margins is pretty straight forward. The command for the left is \XL, while the command for the right is \XR. In both cases, DD3 then expects to find a three digit number after the command. These three digits represent the number of one-fortieths of an inch for their respective margins. Thus a value of 120 is 120 fortieths of an inch, or three inches. Numbers of a value of 99 or less should have a 0 in front of them, because there MUST be three digits. Thus, a value of 020 would be 20 fortieths of an inch, or one-half of an inch. If no margin is desired, then a value of 000 must be entered. Both commands are legal in a new line after a hard RETURN, or anywhere in the first line of a file, before the first character to be printed as text on that line.
The next thing to talk about is how DD3 handles tabs and indentions, but that is pretty involved, and I'll save it for next time, along with explaining DD3's other features. For now, I'd like to tell you about my User's Guide to DD3.
Good Help Is Cheap
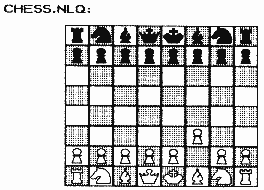
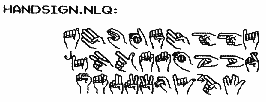
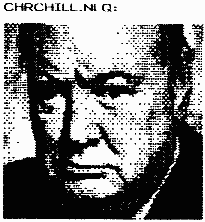
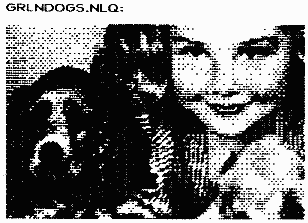
The documentation that comes with DD3 is pretty qood, but it falls short of letting the reader know the extent to which DD3 can be used. It is more of a technical manual than a guide. I found that I kept running into problems which the documentation addressed, but only minimally. For my own use, I created a User's Guide. The first thing I did was I printed out all of the characters of each font that comes with DD3, so that I'd know what they all looked like. If I knew who created the font, I gave their name as creator of the font. If there was anything about the font that I felt was important to know, I'd include a little bit of information about it. The first nine pages of the guide covers the fifty fonts that come with DD3. The rest of the guide covers another 60 fonts that I either created myself, or received from other people. The guide also includes a title page, authors notes from me, and a table of contents listing all of the fonts alphabetically, and also which page to find the font on. Here is but a few examples of the fonts available that do not come with DD3:
Other fonts include Braille, Morse Code, Yahtzee, Crosswords, Print Shop Icons, Microscreens, etc. There is also a print preview program that will allow you to see a graphic representation of a page to be printed. At the moment, it only works with SpartaDos. Also included on the disks are all of the DD3 utilities that I have acquired. The User's Guide is presently 47 pages long. It is available on disk if you want it. You will need DD3 to print it out. If you would like to get my User's Guide, send 5 double sided disks formatted in single density, or 3 double sided disks formatted in double density. Please format the disks in Atari format or Sparta format before you send them, that way they will be formatted with the DOS and density you want, and also so that I won't be wasting my time formatting them, and it will save wear and tear on my drives. The disks will contain all of the text files necessary to print the guide, and they will also contain all of the fonts available, about 110 of them. I consider the disks Public Domain. All I ask is that you send enough money to cover postage. Most people send five dollars.