TapeTime LabelMaker
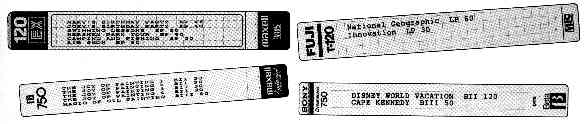
Print VCR labels showing titles, speeds, and times of your favorite movies and shows with TapeTime Labelmaker. A simple modification of Antic's Tape-Time program (January 1989), TapeTime labelmaker will make managing your VCR collection easier than even Works on 8-bit Atari computers with at least 48K memory, disk drive and an Epson-compatible printer.
TapeTime Labelmaker is a label printing utility that will allow you to print the title, speed and time of your favorite videotaped movies or television programs on any Beta or VHS label. I developed the label maker as an add-on to Paul Shannon's TapeTime (Antic, January 1989) which determines the amount of time remaining on partially recorded VCR tapes.
When Antic challenged readers to design a patch for an add-on labeler, I thought this should be no problem! A dozen or so lines of code and presto, a labelmaker. Well, after rummaging through all of my VCR tapes and checking out their labels, I realized that in nearly every instance, no two brands provided the same area and location to print in. In fact, even different tape grades of the same brand had different labels. So much for an easy patch.
What evolved after several approaches to the problem was a user-friendly program that automatically selects the print size on the label according to the number of titles you have entered. This allows you to have up to six titles on Beta format labels and up to seven titles on VHS labels. The positioning of the printing area is accomplished with only one user input. It's that easy!
GETTING STARTED
If you don't already have TapeTime simply type in Listing 2, VCRLABEL.BAS, and be sure to SAVE a copy to disk before you run it.
If you already have TapeTime the patch can be typed and merged with the original listing. Type in Listing 1, TAPEMOD.LST, check it with TYPO II and LIST it to disk. LOAD the original TapeTime program and then ENTER "D:TAPEMOD.LST". Don't forget to SAVE the merged file back to disk as "D:VCRLABEL.BAS".
Several lines of TapeTime have been rewritten in order to accommodate the labelmaking patch. You'll find the complete TapeTime Labelmaker on this month's Antic Disk, ready to RUN without any modifications or merging required.
MAKING A LABEL
When you RUN the modified version of TapeTime the first choice you will have to make is either Do Calculation or Make a Label. If you select Do Calculation you will proceed exactly as in the original TapeTime program.
If you select Make a Label you will next be prompted to choose either Beta or VHS format. After typing your choice, a list of the more popular VCR tape brands will appear onscreen with a column of numbers under the heading of CMAX. This is a suggested value for the maximum number of characters your title should contain in order for it to fit within the allowable space on that brand's label.
After a short time, a scale with numbers ranging from 5 to 35 appears in the message area with room to enter your title right below it. This scale helps you easily determine the number of characters in your title as you are typing it. After entering your first title you will be asked for its speed and time.
This sequence repeats, allowing you to enter up to a maximum of six titles for Beta and seven titles for VHS. If you have less than the maximum, just press [RETURN] when prompted for the next title and you will enter the printing mode.
At this point, insert a label into the printer with the brand name or logo facing to the right. Align the label's left edge with column 0 (on many printers the column scale is located on the tear bar).
HELPFUL HINTS
Now, turn on the printer and, at the prompt, enter the margin setting. A list of VCR tape brands along with some suggested settings will appear. That's about it-press any key and your label will be printed.
If your brand of tape is not among those in the list, make a trial label on paper to insure that your margin setting and title length are correct. An easy way to find the appropriate margin setting is to hold your label next to the printers' column scale with its left edge on column 0. Then read the column number where you want your printing to begin. This is the margin setting.
Once you determine satisfactory margin settings and title lengths for your particular brand of label, you can replace some of the brands on the list with your own brands and values. This way, you won't forget those numbers the next time you use the program. The lists are located in Lines 3015-3070 in Listing 1.
The size of type on the label is controlled by the number of titles you enter. In Beta format, if you have three titles or less, they will be printed in normal-size type. For more than three titles, the print size will be one-half that of normal. In VHS format, four titles or less will be in normal-size type, otherwise you will get the smaller type. If you expect the label to print in the smaller type, I recommend that you use all capital letters in your title for better readability.
After entering your title and speed you are prompted for the program length (in minutes). This was done to keep the same format as in the calculation portion of the program. In the labelmaking portion, however, this is not critical. If you would rather type 2hr instead of 120 (minutes), go right ahead but remember you only have a maximum of three characters. The printer control codes used in this program are Epson codes. If you own a printer that is not Epson compatible you can replace the codes in Lines 3200-3245 with your own printer codes. Each code has a REM statement following it so you know exactly what each code represents. Just look in your printer manual for the proper codes.
When the program enters the printing mode and you input the margin setting, you will notice that the printer advances the label approximately five-eighths of an inch, as a result of the printer receiving the control codes. If you don't take this into account you may have to reposition your label at this point.
You can avoid this problem by turning off the printer's line feed DIP switch when you first place your label in the printer. (My interface has a line feed switch on it also, which makes this process easier.) After entering the margin setting the printer will now receive the codes without moving the label. Turn the line feed switch back on and press any key to print the label.
If you need more room than is allotted on your brand name label, blank
VHS pin-feed labels (sorry, Beta owners) are available in a variety of
colors from SlideScribe, 7141 Shady Oak Road, Minneapolis, MN 55344.
Gary Coppola of Budd Lake, New Jersey is a senior research chemist for a major pharmaceutical company He has written two books and has over 75 scientific publications and patents.
Listing 1: TAPEMOD.LST (Not needed)
Listing 2: VCRLABEL.BAS Download