ST FLIGHT SIMULATOR II
The mouse that soared
 Unlikely
as it sounds, the most exciting ST software so far this year is a mouse-controlled
flight simulator that offers more features than many professional pilot
training units.
Unlikely
as it sounds, the most exciting ST software so far this year is a mouse-controlled
flight simulator that offers more features than many professional pilot
training units.
The Antic staff happily logged dozens of hours in the wild blue yonder with SubLOGIC's Flight Simulator II ($49.95) during the first weeks after the ST version arrived. The breadth and scope of the scenery and the precise flight maneuvering possible with ST Flight Simulator II are truly amazing-far more sophisticated than the 1984 version for 8-bit Ataris.
During our first few flights, we buzzed San Francisco's Transamerica Pyramid, flew under the Golden Gate and Oakland Bay bridges, circled Chicago's John Hancock tower, soared by the Statue of Liberty in New York, did a touch-and-go on Catalina Island's Airport In The Sky, flew a barrel roll around the Empire State Building, landed at the Moffett Field Naval Air Station near San Jose and parked inside one of the hangars there.
The ST edition includes a two-player World War I dogfight game for the "shoot-em-up" set, a Learjet simulator for those who want a speedier and easier taste of flying, and a single-prop Cessna 182-RG (retractable landing gear) four-seater that offers the highest degree of realism.
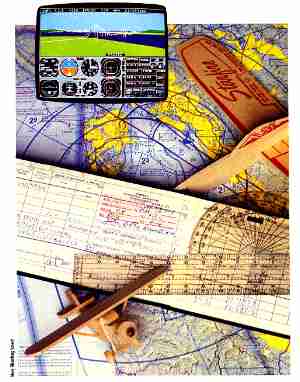
The upper half of the screen is your view from the cockpit window, and the lower half is your instrument panel. Flight instruments are grouped on the left side of the panel, while engine instruments and radios are on the right.
MOUSE FLYING
Flying an airplane with a mouse and a keyboard is a clumsy ordeal. It feels as if you are trying to fly an airplane with one hand tied behind your back. There's too much work for a sliding and clicking mouse to handle. Nevertheless, it only takes about two or three days to get use to the mouse controls. The mouse becomes an acceptable nuisance in light of the program's versatility and power.
The mouse has two modes-Cursor and Yoke. Yoke mode is used to steer the aircraft. An airplane's steering wheel is properly called a "control yoke."
In Yoke mode, you slide the mouse forward and backward to pitch the nose up and down, and slide the mouse left and right to bank the plane. Press the left button while dragging the mouse forward and backward to control the throttle, or drag leftward to apply the brakes.
In Cursor mode, the mouse moves an onscreen cursor which controls the flaps, radios, time-of-day, navigation systems, and numerous other features available from the drop-down menus.
Tap the right mouse button to toggle between these modes. You should become very familiar with both modes. Trying to set your flaps while in Yoke mode might send you tumbling into a barrel roll, while trying to fly the plane in Cursor mode would be as effective as taking your hands off the control yoke, closing your eyes and hoping for the best.
Fortunately, the program offers an option which lets you pause your flight whenever you enter Cursor mode. While paused, your plane is frozen in time and space, giving you time to think, look around and take a deep breath. When you're ready, tap the right mouse button to return to Yoke mode and continue flying.
Here is a sample, "no-frills" takeoff sequence:
1. The program starts you on runway 27-R at the Metropolitan Oakland International Airport, California. Your engine is idling.
2. If your mouse is in Cursor mode, tap the right button to put it into Yoke mode. Next, press the left mouse button and drag the cursor away from you. This is how to advance the throttle, and is equivalent to stepping on the gas pedal in a car. A vertical bar graph on the right side of the instrument panel tells you how far your throttle is advanced. Move the throttle to 100 percent. Next, lift the mouse from the table and place it back in its original position. (If you slide it instead of lifting it, you'll have too much "up" elevator and will have a hard time getting off the ground).
3. Slide the mouse from side to side to steer the plane down the runway. As your airspeed passes 60 knots, gently pull the mouse straight back towards yourself, until the runway drops away from the plane.
4. Go into Cursor mode and click on the landing gear icon (or press the [U] key) to raise the landing gear. Remember to return to Yoke mode once your gear is up.
Most people will tend to slide a mouse in an arc rather than a straight line. Thus, it's very difficult to lower the plane's nose without putting it into a small turn, or to apply the brakes without steering off the runway Furthermore, any gradual, imperceptable mouse movement will be relayed to the aircraft's controls and slowly throw you off course.
In flight, most joysticks and control yokes tend to return to a neutral, centered position when left alone. If they're in a different position, the pilot only needs to feel the joystick or yoke to determine its position. The mouse is not self-centering, and you must check bar charts on the instrument panel to find out exactly where it is and what it's doing.
SPOTTER PLANE
When learning to fly an airplane, it's important to see your mistakes. Often, your flight instructor will take you aside, flatten his palm to resemble an airplane, and say "Charlie, you're going like this (Swoosh) when you should be going like this (Swish)'
Flight Simulator II can give you an exterior view of your plane while you re flying it. The feeling is very similar to flying a remote control plane-you see your plane bank when you slide the mouse to the side, or see the landing gear move up and down when you press the [U] key.
These exterior views come from a "spotter" plane, an invisible aircraft constantly flying in formation with you, watching everything you do. You can observe your plane through the spotter plane's window instead of seeing the view from your own cockpit window, or you can watch both views at the same time.
You can put the spotter on either side of your plane, in front of it or behind it. You can also set the distance between your plane and the spotter, or program it to loop around you as you fly.
INSTANT REPLAY
At any time you may pause and watch an instant replay of the past 75 seconds of your flight. This feature becomes a very powerful learning tool when combined with a spotter plane. We'll use our takeoff sequence as an example. Assume that just after takeoff you pushed forward on the mouse, causing your plane to hit the ground again. For a clearer view of what happened, pause your flight and switch to your spotter plane's view of the action.
Now, turn on the instant replay. You'll see a movie of your plane rolling down the runway, leaving the ground, then landing again. Let's watch that again, but this time we'll move the spotter plane to a different vantage point.
Watching an instant replay from a spotter plane can be remarkably instructive, particularly when you're learning to land the plane. From the spotter's viewpoint you can see your glidepath, your touchdown point, and the overall smoothness of your landing.
The day Flight Simulator II arrived at Antic, we used these features to fly, record and watch our plane fly between the two towers of the World Trade Center in Manhattan. For even more spectacular views, your cockpit window may be expanded to fill the screen.
SCENERY
The early Link Trainers had no scenery at all. Subsequent simulators featured generic scenery-nondescript rivers, roads, runways and oceans. Such scenery made traffic patterns and local flights easier, but cross-country flights quickly became boring and predictable because there were only one or two possible runway and scenery configurations.
By contrast, once you see the surprising amount of detail present in ST Flight Simulator II scenery, you'll want to switch-on the autopilot and spend several hours sightseeing.
The buildings, bridges, mountains and runways which make up this scenery are not as pretty as computer pictures you might create with DEGAS. In fact, they look more like simple sketches done on a KoalaPad. You don't need a highly detailed rendition of the Empire State Building when you're flying over Manhattan. You just need to know where it is so you can use it as a navigational landmark. And Flight Simulator II places it precisely in the correct position.
In this respect, Flight Simulator II scenery is infinitely more useful than pretty computer drawings. For example, its representation of Republic Airport, (a small field in Farmingdale, NY near my Long Island hometown) shows both runways (14-32 and 1-19) facing in the proper direction, placed at the correct spot in Farmingdale, and set at the correct elevation.
Mike Kulas, programmer of the ST version of Flight Simulator II, said that scores of people spent hundreds of hours poring over aeronautical charts, reference books, digitized photos and even picture postcards to create these scenery databases. Sub-LOGIC urges you to tell them about it, if you notice any omissions in the scenery. And if the program becomes as popular as its eight-bit counterpart, SubLOGIC plans to introduce additional scenery disks this spring.
INTERACTIVE MAPS
The scenery data is also used by the Map function, which adds a small map to your cockpit window Cross-hairs in the center of the map mark your position. Initially, the map is about the size of a postage stamp, however you may expand it to any size.
There's also a "zoom" function which adjusts the scale of the map. If you're in a new area, "zoom out" to see your position in relation to the surrounding countryside. "Zoom in" for more detail to find the smaller airports.
There are three ways of getting around with ST Flight Simulator II. The most obvious way is using your throttle, stick and rudder. The two other ways are "slew" and "position setting."
SLEWING
Slew could be nicknamed "flying carpet mode." A "slewing" plane is suspended above the ground, but capable of spinning and moving back and forth. Move the mouse to the right to spin the plane to the right. Move it left to rotate it the other way. Move the mouse forward to move the plane forward, and pull it back to move the plane backwards. Slew mode is useful for quickly setting up final approaches, as well as for sightseeing.
Slew mode also adds a text line to display your present map coordinates. These coordinates serve the same function as longitude and latitude, but the similarity ends there. The software's "north" and "east" coordinates do not correspond to traditional concepts of north and east. SubLOGIC supplies specially marked maps to help you find your way through the skies.
TELEPORTING
Finally, you can "teleport," or type-in the coordinates of your destination. This comes in handy when hopping between cities for a sightseeing tour. Just enter the desired north, east and altitude coordinates, and ST Flight Simulator II will bring you there. You may determine the proper coordinates from the maps included with your disk, or you can enter the coordinates of any interesting place you may have "slewed" to in the past. But be careful with your altitude coordinate, or you may find yourself underground.
SAVING A SITUATION
If you find yourself in a particularly interesting position, you can save it to a disk file and return to it at any time. The disk file contains your location, altitude, speed, heading, position of your flight controls, and everything else needed to recreate the situation.
You can store as many as 12 different situations at once. Your entire collection of situations will be written to a 4096-byte disk file named F7. If you want to save any more situations, you must either delete a previous one, or use another disk. You can only store 12 situations in a situation file, and you can only have one situation file per disk. For safety's sake, make each of your F7 files the only file on a separate disk.
ABOUT THE PROGRAM
ST Flight Simulator II is written in 68000 assembler and only uses GEM to read the mouse, monitor the keyboard and control disk I/O. SubLOGIC wrote their own custom graphics routines to handle everything else. "At the time ST Flight Simulator II was being developed, GEM and the Line A routines were still changing," said Sub-LOGIC's Mike Kulas, "so we wrote our own specialized graphics routines which were significantly faster."
WHAT'S NEXT
SubLOGIC's next product will be an ST version of Jet, their popular multi-player hi-tech dogfight simulation currently available for Commodore, Apple II and IBM PC computers. Kulas says the ST version will be "much more sophisticated" than the previous versions." Jet will be faster and more colorful than ST Flight Simulator II.
Final versions of Jet are expected to include multiple 3-D views, a variety of weapons, tracking systems and moving scenery. This scenery will include lightning, jet trails, explosions, sunsets, music and other sound effects. Expect to see Jet early this spring.
Antic Technical Editor Charles Jackson is a licensed Private Pilot and was a Link Trainer Engineer for the Long Island Air and Space Museum.
FLIGHT SIMULATOR II
(Atari ST version)
SubLOGIC Corp.
713 Edgebrook Drive
Champaign, IL 61820
(217) 359-8482
(800) 637-4983-orders
Requires color monitor
$49.95
CIRCLE 269 ON READER SERVICE CARD