Starting Out
BY DAVID PLOTKINANTIC CONTRIBUTING EDITOR
New Owners Column
Lesson 13: Color Commands
This series teaches beginners how to program in BASIC on all Atari 8-bit computers such as the 800XL and the 130XE. The first lesson appeared in the March, 1986 Antic.Last month we began presenting the Atari's graphics capabilities with an introduction to the graphics modes. This month, we'll look more closely at these modes and practice using them in our BASIC programs.
With a little planning, it can be quite simple to plot images on your screen. Essentially, all you have to do is tell your Atari the color and location of each dot you want drawn. Your Atari will move its drawing tool, (the cursor) to the proper spot and then draw the dot.
SCREEN COLORIZING
We need to look at the color commands first. The easiest and most widely-used
of these is the COLOR command:
10 COLOR X
The above statement tells your Atari to draw with color X, where X represents a positive integer. Legal values for X depend on the number of colors available to you in the graphics mode you're using.
For two-color modes (GRAPHICS 0, 4, 6 and 8) X may be equal to 0 or 1. Here, 0 is the background color-handy for erasing.
For four-color modes (GRAPHICS 3, 5 and 7), X may be equal to 0, 1, 2 or 3. Again, 0 refers to the background color.
GRAPHICS 10 allows COLOR values from 0 to 8. GRAPHICS 9 and 11 allow 0 to 15. (Remember, these three modes do not allow text windows.)
PLOT AND DRAWTO
After you've chosen a color, it's time to position your dot on the
screen. The PLOT command draws a dot of the chosen color at the
specified screen coordinates:
10 GRAPHICS 7:COLOR 2:PLOT 10,15
The above example draws a dot in COLOR 2 at a point 10 steps from the left edge of your screen and 15 steps down from the top edge. The POSITION command is a variation of PLOT. It holds the cursor at the specified screen coordinates, but does not draw any points.
The DRAWTO command uses the current color to draw a line from the last known cursor position to the desired cursor position. Either PLOT or POSITION, or the final coordinates of the previous DRAWTO command, can be used to define the starting cursor position in a DRAWTO.
10 GRAPHICS 7:COLOR 2:PLOT 35,79: DRAWTO
78,0:DRAWTO 124,79:DRAWTO 15,20:DRAWTO
144,20:DRAWTO 35,79
The above example draws a star on your screen. You can also use COLOR, PLOT and DRAWTO in the text modes described in last month's lesson.
The charts below give you the proper numbers to use with the COLOR command. You can then PLOT and DRAWTO using characters instead of points.
The following example will give you a line of "A" letters:
10 GRAPHICS 0:COLOR 65:PLOT 0,0:DRAWTO 10,15
CHOOSING COLORS
Your Atari can produce 16 luminances (shades) of 16 individual colors.
All in all, this gives you 256 colors to choose from.
The Atari sets aside certain memory locations, called color registers, which store the colors referenced by the COLOR command. When you turn on your Atari-and every time you issue a GRAPHICS command-certain default colors are put into these color registers.
For example, COLOR 0 (the background color) in GR.7 is black, and the three other colors are orange, light green and dark blue. But you can change these colors so that COLOR 1 is any color you please. The key is the SETCOLOR command.
10 SETCOLOR X, Hue, Luminance
The hue and luminance numbers range from 0 to 15. Unfortunately X, which refers here to the color being set, is not the same as the number used in the COLOR statement.
The tables below will show you how to properly use SETCOLOR in different GRAPHICS modes.
GR. 0 & 8
SETCOLOR Register
Char/Dot luminance
1 709
Background
2 710
Border
4 712
For SETCOLOR 1, only the luminance data is used- the hue is ignored. In Graphics 8, COLOR 1 is the dot color, and COLOR 0 is the background color.
GR. 1 & 2
SETCOLOR Register
Upper-case & Numbers 0
708
Lower-case characters 1
709
Inverse upper-case
2 710
Inverse lower-case
3 711
Background/Border
4 712
GR. 3, 5 & 7
SETCOLOR COLOR Register
Four colors
0 1 708
are allowed
1 2 709
2 3 710
Background/Border 4
0 712
GR. 4 & 6
SETCOLOR COLOR Register
Dot Color
0 1 708
Background/Border 4
0 712
This system is not particularly easy to grasp, so keep these charts handy.
Modes 9 and 11 still use SETCOLOR 4 (register 712) for the background color. In Graphics 9, SETCOLOR 4 defines the single available color (luminance is ignored), while the COLOR command chooses between the 16 available luminances.
In Graphics 11, SETCOLOR 4 sets the luminance (and hue data is ignored), while the COLOR command chooses between the 16 colors, all in the specified luminance.
POKES NEEDED
Graphics 10, however, is a special case. Although it lets you use nine
colors at once, you can only define five of them with SETCOLOR. The remaining
color values must be stored directly in color registers.
With SETCOLOR, you can set five colors-SETCOLOR 0-4, COLOR 1,2,3,4, and 0; registers 708-712. The other four colors are stored in registers 704-707, with 704 being the background color. You can't set these colors with SETCOLOR-you must POKE the color data into them. The method below also works for the other color registers in all GRAPHICS modes.
To determine the number to POKE into a color register, use the following formula:
NUMBER = (HUE *16) + LUMINANCE
For example, to put color number 2, luminance 4 into register 704, you would use the following statement:
10 POKE 704,2*16+4
Or you could use: 10 POKE 704,36
Using SETCOLOR or POKE to change the colors in a color register is a very powerful technique known as color indirection. For example, if you draw something on the screen in Graphics 7 using COLOR 1 and then use SETCOLOR 0 to change the contents of the color register, everything drawn in COLOR 1 will change to the new color.
THE LISTING
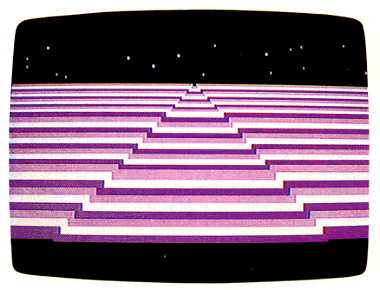
This month's listing uses all our new commands to draw a striped interstellar
landing strip which appears to move. You can control the "speed" of the
landing strip with a joystick plugged into port one. Push the stick forward
to speed up, pull it back to slow down.
The image seems to move because the program sequentially interchanges the values in the color registers. Stripes originally drawn in COLOR 1 now look as if they were drawn in COLOR 2, stripes which were originally drawn in COLOR 2 now appear in COLOR 3, and so on. This technique is called "color rotation."
Type in Listing 1, NEWOWNl3.BAS, check it with TYPO II and SAVE a copy before you RUN it.
Next month, we'll conclude the New Owners Column by showing you how to add sound to your programs. Coming issues will present a new series of lessons about programming animation graphics on the 8-bit Atari.
Listing 1 NEWOWN13.BAS Download