Display Master
Stretch, squeeze, fold, flop, flip and roll your pictures
by DAVE OBLAD
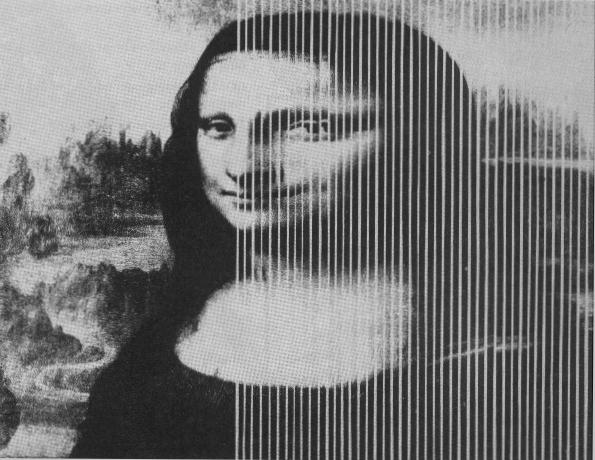
Turn your picture files into silly putty with Display Master. This ACTION! program will stretch, squeeze, fold and otherwise manipulate Graphics 15 pictures, MicoPainter and Micro Ilustrator files. The program requires 48K, a disk drive and the ACTION! cartridge from O.S.S. Antic Disk subscribers will find a run-time version of the program which can be used without the ACTION! cartridge – LOAD it by going to DOS 2 without BASIC and setting the "L" option on DLMASTER.EXE.
A short wbile ago, Dave Oblad sent Antic a solution to "The Eigbt Queens Problem" (April, 1985). As an afterthought be included Display Master. We booted "Eigbt Queen" liked it, and will publish it in our next issue. But, wben we looked at Display Master, it knocked us off our pneumatic computer stools. We tbink it will do the same for you.–ANTIC ED.
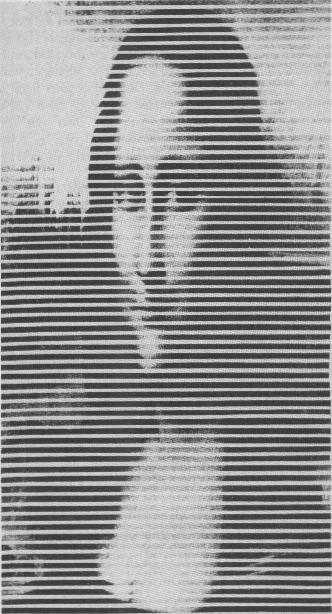
I was sitting in front of my Atari, which was flipping through a collection of picture files via the Fader program ("Fader II," Antic, May 1985) when I began thinking of those sophisticated special effects used on television, where a picture is squashed, stretched, or goes zooming off into infinity. I wondered if it might be possible to do something similar with my own picture files. So, I set down programming and only a few short weeks later I had Display Master.
THE PROGRAM
Type in the program and save it to disk. Because it uses a good deal of memory; you must compile the program directly from disk. See your ACTION! manual if you're uncertain of this procedure.
When run, Display Master will present you with four options: You can load a new Micro-Painter format picture file, or manipulate a previously loaded picture file, or manipulate a built-in moire pattern, or run a demo program. (We'll discuss Micro Illustrator files later.) For now, choose [D] for the demo program.
A random moire pattern will be drawn on the screen and Display Master will go through its paces. Any time you want to stop, press any keys and you'll return to the option menu.
PICTURE MANIPULATION
Press [P] to load a Micro-Painter file, and you will be asked to place a disk with your pictures in drive 1. These files must be 62 sectors with an extension of .MIC or .PlC. Press [RETURN] when the disk is in the drive and you will see a directory of the files. Type in the device and filename, in the form D:FILENAME.?IC, press [RETURN] and you will arrive at the programming screen.
(If you don't have Micro-Painter files, choose [M] to manipulate a moire screen.)
The programming screen is where You choose your sequence of display manipulation "steps." Display Master offers you 10 manipulation choices and you can program a sequence of up 250 steps. The choices are:
(1) Restore original picture.
(2) Invert the picture.
(3) Mirror-flip the picture.
(4) Shift picture.
(5) Double-crush the picture.
(6) Fold the picture.
(7) Unfold the picture.
(8) Roll (by interlacing) the picture 50%.
(9) Pause for 2 seconds.
(0) Repeat from first step.
Editing this sequence requires the use of 4 keys on the keyboard. Together they allow you to create a series of steps. Each step, when executed, will store the chosen manipulation for that step and move on to the next. The 4 edit keys are:
[-] Minus key to back up a step.
[+] Plus key to move forward a step.
[*] Asterisk key to delete that step.
[=] Equal key to begin execution.
To install a new step simply select an option from 0 to 9 and type that key. The chosen manipulation will be inserted at the current step mumber. A small step window is displayed with the current step pointed to by a "greater than" symbol [>].
For example, type the following sequence:
3939292988670
The pointer should now be pointing to step 14. Press the equal key [=] then [START] and the picture will be loaded into memory then displayed with an ACTION! version of Fader. Your new sequence will then begin. To halt the manipulations, press [START] until the first option menu appears again. From here you can load another picture or return to the editing screen to change the sequence on the currently loaded picture.
MICRO ILLUSTRATOR
If you don't have Micro-Painter; you can save Micro Illustrator files (the software that comes with KoalaPad, Atari Touch Tablet, etc.) by pressing [INSERT] while in Micro Illustrator. This will save your picture in a 62 sector, uncompacted file called PICTURE.
Unfortunately, the last four bytes of Micro-Painter files contain color register values which will not be saved with this process. To add color to uncompressed Micro Illustrator files, RUN the BASIC program below after placing your color values in the variables in line 10, and you picture filename in line 20.
10 K712=66:K708=30:K709=148:K710=196

20 OPEN #1,9,0,"D:PICTURE.PIC"

30 PUT #1,K712:PUT #1,K708:PUT #1,K709:PUT #1,K71O

40 CLOSE #1
ABOUT THE PROGRAM
Display Master gets most of its effects by juggling the display list for Graphics 15 (or 7+) mode. Each of the 192 diplay lines are set up with a Load Scan Counter with NNNN Address instruction. The effects are then produced by swapping these byte instructions.
To expedite the swaps, a duplicate set of addresses is maintained in the card array DL(192). Juggling the array and transferring the results to the real display list allows some fast and spectacular displays to be produced. The orginal addresses of the display list are saved in the card array SL(192) for fast restoration of DL(192).
Some manipulations require direct access of the screen memory. For this I defined the memory location of byte array RAM(8000) to overlay the sceen memory, thus giving direct access to the display data. Byte array ORG(8000) contains the original picture data for fast restoration of the screen.
One other point that should be mentioned involves mirror-flipping the display. Simply reversing the bit order in a displayed byte and swapping byte positions on a line doesn't quite hack it. Remember, the half-nibbles in a given byte define a pixel's color, and reversing the whole byte can really foul up an orginal pixel's color.
The solution was to create a lookup table that uses the original byte value as an index into the table, where the corrected pixel mirror image is stored. This also speed reversing the bit order for a given byte. The table is created near the end of the FIND( ) procedure and is declared as byte array REV(256).
PROCEDURES USED
FIND( ) locates and allocates memory work areas amd makes the reverse table.
MAKE( ) Makes the display list for Graphics Mode 7.5.
SHOW( ) Transfers the address list from DL( ) array to the real display list.
RESTORE( ) Restores the original screen RAM and display list addresses.
FADE( ) Brings the picture to the screen roughly like the Fader program.
REVERSE( ) Flips the picture upside down by reversing the display list.
MIRROR( ) Swaps the pixel positions from each side of the screen.
SHIFT( ) Wraps the picture around so that the center becomes the edges.
DOUBLE( ) Removes odd numbered display lines and duplicates to lower half.
UNFOLD( ) Interlaces even and odd lines in reverse order
FOLD( ) Interlaces or weaves alternate lines in an ascending sequence.
R0LL( ) Moves odd numbered lines down and even numbered lines up with rollover at the top and bottowm.
WAIT( ) A two second dead time to support the pause option.
MOIRE( ) Generates a semi-random moire pattern In Graphics mode 7.5.
FETCH( ) Fetches and displays the picture file defined in ARRAY FILE(40).
GETFILE( ) Prompts user for a file name and displays the disk directory.
DISPLAY( ) Displays the current step and function assigned to that step.
SETUP( ) Displays main option menu and supports the step editing.
MAIN( ) Translates each step into a procedure call.
Dave Oblad is a "non-degreed" Electronic Design Engineer specializing in microprocessor controlled instrumentation. He's been programing in assembly language for eight years.
Listing 1 DLMASTER.ACT Download / View
On disk DLMASTER.EXE Download