PRICE'S COLOR PICTURE PAINTER
By PHILIP PRICE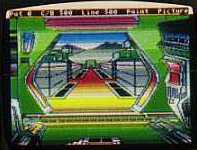
SYNOPSIS
This program lets you change all four colors on every scan line
in pictures drawn with most graphics programs that use Mode E, Atari's
high-resolution four-color mode. It works on all Atari computers,
but requires a disk drive. Antic Disk Subscribers: Remove BASIC. From DOS.
Type L [RETURN] then type PAINTER.EXE.
You've been painting with tools like your KoalaPad or Micro-Painter for some
time now, and you've pushed the programs to the limit. You're tired
of having only four colors available! What can you do?
Fortunately, here's Philip Price's Color Picture Painter,
a program allowing you to systematically replace all four colors in each
scan tine of your pictures-with any of the 128 colors available on the
Atari. (Scan lines are the horizontal lines traced by the electron beam
of your picture tube. Each scan line represents a fraction of a picture
you have created on your Atari.)
Price's Painter loads an uncompressed Mode E file, (called
Mode 7 1/2 on older 400s and 800s or Graphics Mode 15 on the XL computers),
and then allows you to choose from 16 colors and eight degrees of brightness
for each of the four colors used in the original drawing. You use
the joystick to color one scan line at a time, or to color entire vertical
bands at once.
When you are finished the painter stores the original
picture and the four color "pots" that you've created. The five files
are separate, and are combined only when you run the painter program.
Price's painter works with files created by Micro-Painter,
and Micro lllustrator, (available with the KoalaPad, Atari's Touch Tablet,
Tech Sketch's Lightpen and Chalkboard's PowerPad). Incidentally,
if you are using the Touch Tablet, you will need to save your initial file
in the uncompressed 62 sector mode by hitting the [INSERT] key while the
picture is on your monitor. The file will be named "PICTURE." and
you will need to go into DOS and rename the file "FILENAME.PIC".
It's easy to get started coloring ...
STEP 1: STARTING
Painter is a machine language program that's produced by the BASIC
program accompanying this article Type in the listing, and SAVE an extra
backup copy. Next, RUN this program. The screen will go dark
for several minutes so the computer can read the data faster. If
you made a typing error, the program will stop and display the number of
a line you need to retype correctly-so TYPO isn't needed. When the
screen turns blue again, press [RETURN] to write the machine language program
named PAINTER.EXE to disk.
Remove your BASIC cartridge (XL owners press [OPTION]
while booting DOS) before using Painter. Load PAINTER.EXE from DOS
with menu option L. If you wish to have the program load automatically
upon booting use DOS menu option E to rename the file to AUTORUN.SYS, and
make sure DOS.SYS exists on the disk.
When painter starts, you will be asked which file to load.
The file disk must be in drive 1, and the filename extender must be PIC.
Don't use backspace or cursor controls, since the program will only accept
a maximum of eight keystrokes before going to screen. Use DOS to
rename files if necessary. Type in the name of the file you had previously
created with say, Micro-Painter. After the picture loads, you'll
see it on screen with the default colors, the colors used in your original
drawing. If you didn't use all four colors when making your original,
some pots will be black, but they can be colored with Painter.
STEP 2: COLORING
Plug a joystick into Port 1. Press the fire button while pushing forward
or backward on the stick to position the arrows on either side of the screen.
Release the button and move the joystick from side to side to select the
color, move forward and backward to change a color's intensity. Note
that you're in point mode (see the line at the top of the screen); this
means that you will color one line at a time.
If you have trouble seeing the thin horizontal line's
color, look at the top of the screen to see the color changes is a wider
area. If you want to color larger areas, press [ESC], then [SELECT] to
switch to brush mode, and push the stick forward and backward to paint
large areas with the currently selected color. Press [ESC], then
[SELECT] again to return to point mode.
STEP 3- BACKGROUND AND FOREGROUND
You have a palette of four pots, based on the four colors of your original
file. The palette is the field of colors in a given pot, without
the structured picture. To change the pot whose colors you're modifying,
press [SELECT]. TO switch back and forth between the picture and
the palette, press [OPTION]. You can review the colors you're using
without seeing the picture by switching to the palette, then using [SELECT]
to move through the four pots.
STEP 4- SAVING
Press the [START] key to save the pots, but not the picture file.
According to Philip Price, the program occasionally locks up when you press
[START], necessitating rebooting. The program saves four files representing
the four pots. Checking your disk directory, you'll see them called
FILENAME.P0, P1, P2, and P3, with FILENAME replaced by the filename you
originally typed in. If you have the original file and the four pots
on the same disk, and don't change any filenames, the next time you load
the picture into Painter, the four pots will also be loaded.
If you wish to work on a different picture, you must reload
the entire program and start again from the beginning.
Philip Price taught himself programming while serving at sea with the US Navy. He took his discharge in Hawaii and worked near Hilo as a computer technician. Now he's teamed with Gary Gilbertson and their major new graphics adventure game, The Alternate Reality Series is due for release by Marsten Systems this fall.
Listing: PAINTER.EXE Download