Keystroke Artist
Drawing program in Graphics 10
By Alan Gellings
Requires 32K RAM and GTIA
 Those of you who have been waiting for the ultimate drawing program
need wait no longer. The Keystroke Artist is here. Now you can create outstanding
artwork in nine different colors, with easy-to-use commands and an ordinary
joystick.
Those of you who have been waiting for the ultimate drawing program
need wait no longer. The Keystroke Artist is here. Now you can create outstanding
artwork in nine different colors, with easy-to-use commands and an ordinary
joystick.
Before you begin, however, be sure your computer has the GTIA chip. To check this, write the following short program:
10GR. 9
20 GOTO 10
RUN
If you get a black screen, you have the GTIA chip. If you get a blue screen, you have the CTIA chip. This program uses Graphics Mode 10, which is not available on the CTIA. Most recently sold machines have the GTIA, but if you don't, you can get one installed at an authorized service center.
Type in the program and SAVE it on cassette or disk, then follow these simple instructions. In this article you wilt find many single-letter commands described. Our style is to show keys enclosed in brackets, for example [A] or [SHTFT]. The bracket signifies that the item is a key on the ATARI keyboard. Do not type the brackets themselves.
PROGRAM OPERATION
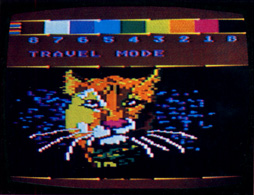
The Keystroke Artist is full of different commands that make picture creation as easy as possible. It has two main modes of operation: "Draw Mode" and "Travel Mode". When the program begins, you are automatically placed in Draw Mode. Plug a joystick in Port One to move the cursor. In Draw Mode, as the cursor moves it leaves a trail of color If you press the joystick button while moving, everything in your path will be erased.
In Travel Mode, you can move the cursor anywhere without annihilating anything you've already drawn on the screen. You can toggle between Draw Mode and Travel Mode by pressing the [T] key on the computer keyboard. Another feature of Travel Mode is the ability to draw in your current color by pressing the trigger on the joystick. This makes it possible to move anywhere on the screen and leave a dab of color.
INDIVIDUAL COMMANDS
Whenever you enter a command, you are automatically placed in Draw Mode. If you accidentally enter a wrong command, press [X] and try again.
[C] (Change Current Color)
Press this key to change the current drawing color. When "Change Color To:" appears in the command window, enter a number from one to eight. This changes the drawing color to your choice of the color windows at the top of the screen. The background color cannot be used for drawing.
[N] (New Color)
This is used to change the default screen colors to colors which may look better in your picture. You may choose from 128 different colors. When "New Color For:" appears in the command window, enter a number from zero to eight. Zero is used for background color. To select a new color, push the joystick up or down and press the red trigger button. Colors can also be chosen by using the keyboard "cursor-up" and "cursor-down" keys, and [RETURN] key takes the place of the joystick button.
[R] (Restore Original Colors)
To restore your colors to the default colors that were present when the program began, (black, red, orange, yellow, green, blue, purple, white and brown), press [R].
[I] (Instant Cursor Position)
![]() There will be times when you want to move the cursor quickly to another
part of the screen. Do this with the Instant Position command. The command
enables the cursor to instantly move any of nine different positions on
the screen. Positions 1 through 9 are laid out in a pattern similar to that
of the buttons on a touch-tone phone. To move the cursor to a numbered position,
type [I], press the trigger button, and type the number. If you don't press
the trigger, a pixel will remain lighted where the cursor started.
There will be times when you want to move the cursor quickly to another
part of the screen. Do this with the Instant Position command. The command
enables the cursor to instantly move any of nine different positions on
the screen. Positions 1 through 9 are laid out in a pattern similar to that
of the buttons on a touch-tone phone. To move the cursor to a numbered position,
type [I], press the trigger button, and type the number. If you don't press
the trigger, a pixel will remain lighted where the cursor started.
[Z] (Draw a Line)
A line connecting two points can be drawn by pressing [Z]. After entering this command, move the cursor to the place where you want to start the line, then press the button to mark this place. Then move the cursor to another location with the joystick. Press the trigger again to connect the two points. If you should ever accidentally get into this command, press the joystick button continuously without moving the cursor to reenter Draw Mode.
[F] (Fill a Space)
This is used for the fill command, which fills any four-sided polygon (must have a horizontal bottom) with a solid color. The background color may not be used, and the polygon must be free of any other color for this command to work properly.
Draw your polygon from the lower-right corner. Move the cursor to the upper-right corner and press the trigger. Next, move to the upper-left corner and again press the button. Finally, fill things in by moving to the lower-left corner and pressing the button. Remember that the last point must be horizontally level with the first.
Entering the [F] command by mistake may be remedied by pressing the trigger button repeatedly until the Draw Mode is reentered.
[D] (Duplicate a Quadrant)
Sections of the screen can be duplicated with the following commands. They are used by numbering the screen into four quadrants (upper left = 1; upper right = 2; lower left = 3; lower right = 4). Note that these areas are marked off on your display. The vertical center is at the middle of each of the two borders immediately above and below the drawing area. Small dots show the horizontal center, and the imaginary lines that connect these locations mark off the different quadrants.
Duplicating any quadrant of the screen to another quadrant is performed using the [D] commands. Enter a number from one to four to specify the quadrant to be duplicated. Then enter a number from one to four to specify the destination.
[M] (Mirror Image)
The [M] command transfers a mirror image of one quadrant into another. It is used like the "Duplicate" command.
[E] (Erase)
Erasing the entire screen or just a small section is possible with the [E] command. If you choose to erase the entire screen, simply enter [A] to specify "All". If you change your mind, enter an [X] to escape. Pressing [P] (partial erase) is an option that should be practiced until you get a feel for the amount of screen you will be erasing. The [P] option provides a choice of a small or a large section. The area erased is to the right of and under the cursor. If you are close to the screen edge, there is no wraparound, and the erased area is proportionally smaller.
[$] (Save Screen)
To save a drawing to disk or tape, simply press [S] and follow the prompts. You are first asked if the storage medium is on disk or tape. Answer with a [D] for disk, or [T] for tape. If you are using tape, press [RETURN] after you hear the two familiar beeps. With disk storage, be sure to use a DOS 2.0S formatted diskette. Filename extenders are not permitted (CAR is okay but CAR.MY is not). Your filename may contain eight letters or numerals as long as the first one is a letter. While the screen is being saved, the screen will change color to signify that an input or output operation is underway.
[L] (Load Screen)
Loading a program is as easy as saving a program. Type in a filename (without a device name) for diskette, or for cassette, press [C], and then any key after the beep.
Listing: KEYSTROK.BAS Download
Alan Gellings is studying for a degree in Computer Science at the University of Wisconsin (Oshkosh, by gosh), and is especially interested in the graphics possibilities of the ATARI.