BY JOHN B. HOLDER
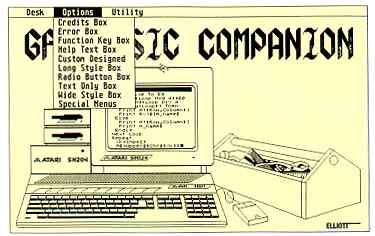
Design top-quality dialog boxes with COMPAN.ARC on Side 1 of your START disk.
The GFA Companion, formerly a commercial product marketed by MichTron, is on your START disk this month. This powerful package lets you design sophisticated dialog boxes, text screens and menu bars-and creates code you can merge directly into your GFA BASIC programs. GFA Companion runs in medium or high resolution.
In the past, designing a professional interface
for your programs meant using a Resource Construction Set (RCS). Although
these utilities make it easy to create dialog boxes and drop-down menus,
integrating the resources into your BASIC program takes time and effort,
especially since most RCSs on the ST are primarily geared toward C
programmers. Now you can use GFA Companion to create the dialog boxes
for you-and it will automatically generate code you can merge directly
into your GFA BASIC program.
The GFA Companion, formerly
a commercial product marketed
by MlchTron, lets you
create customized dialog boxes and menu
bars for your GFA BASIC
programs. GFA Companion generates
ASCII source code that
you can merge directly into your program.
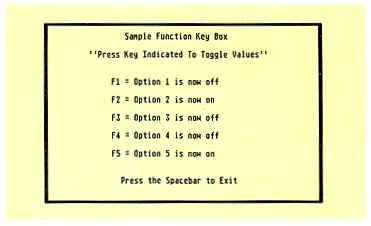
Create a function-key
box for your program's users to set
program parameters. The
GFA Companion code draws the
box and toggles the switches
If the user presses a function key.
Features of GFA Companion include:
-
Automatic generation of credit boxes, help screens, error boxes and function-key
boxes.
-
Automatic generation of custom dialog boxes with radio buttons and scroll
bars.
-
Automatic generation of "Bottom Up" menu bars or "Detached" menus that
can appear anywhere on the screen.
- Fully commented GFA BASIC source code that you can merge directly into your program and begin to use immediately.
To get started, boot your START disk; the START menu program runs automatically. Click on Prepare, then select GFA Companion. The program and associated data files will un-ARC directly onto the destination drive you specify Double-click on COMPAN2.PRG from a medium or high resolution Desktop; the files OVL010, OVL020, OVL030, GENCOLOR.RSC and GENMONO.RSC must be in the same directory as COMPAN2.PRG. GFA Companion was upgraded after its initial release; the newest version is 2.03. If you're running the program from a 520ST, you may need to disable your desk accessories and autorun programs in order to use GFA Companion.
GFA Companion is easy to use; in most cases you simply need to follow the program's prompts. When entering text, you can usually use the ST's [Alternate] and [Control] key combinations for special characters. Most of GFA Companion's menu options create a dialog box or menu bar. When you select one of these options, an alert box will ask if you really want to use that option; click on Yes to continue. At the end of each session, an alert box asks whether to Save or Abort your work; you must click on Save at this point if you want to save your work to disk.
GFA Companion uses the default file extension .LST. To use the listings in your program, run GFA BASIC, load your program, position your cursor at the end of the program and click on Merge from the menu at the top of the screen. Using the Item Selector box, click on the GFA Companion file to use. Each GFA Companion subroutine uses the same name as its filename. You must call the subroutine using either:
MYPROG.LST
or
GOSUB MYPROG.LST
(In GFA BASIC 3.0 you can call a subroutine simply by using its name.)
Many subroutines will return a value in a global variable; if so, this will be completely documented so you can begin using the code immediately.
GFA Companion Menu Options
Desk
About Program: Program credits and version number.
Options
Credits Box: Select this option and click on Yes to create a program-credits
box. An outline of the box will appear on screen; at the prompt, enter
the title. When you press [Return] to enter the line, an alert box will
ask you whether the text style should be Normal, Bold or Italics. After
you enter the title, you'll be prompted to enter 12 more lines of text.
To enter a blank line, simply press [Return] at the prompt. The program
will ask you to indicate the style for each line of text, and will center
each line automatically. Enter *q or *Q at the prompt to abort.
Error Box: This option creates an alternative to the standard-form error-alert box used by GEM AES. Select this option and the error box will be displayed on screen; when you merge the code into your program and properly set an error trap this box will come up when there is an error and the routine will return the user's selection.
Function Key Box: Click here to define up to five function keys for keyboard input. You assign two strings to a function key; for example, "Insert Mode On" and "Insert Mode Off." When you finish assigning keys, save your work to disk. When you call the function-key procedure from inside your program, users can toggle options by pressing the appropriate key. To create a function-key box, select this option, then enter the title. The program will prompt you for five primary and secondary key definitions; enter "Quit" at the prompt to abort the process.
Help Text Box: This option lets you create multiple-page help screens. You can enter up to 500 lines of help with 42 characters on a line; each line is centered automatically. Type "Quit" at the prompt to save your help box. There are 12 lines of help on each page; when you save the listing the user will be able to scroll through the pages using the arrow keys.
Custom Designed: Select this option to create customized dialog boxes; your dialog boxes can be as simple or as complicated as you wish. An alert box will ask whether to display resolution overlays; if you click on Yes, it will place a grid on the screen showing where the other resolutions would be in proportion to the current screen. The program will prompt you to draw the outside outline of the box. (After this, you'll be given an opportunity to Continue or Abort at each stage of the dialog-box creation process.) Continue in this manner to create three more boxes and an exit button inside the outline. (If you wish more or less than three boxes, you will need to modify the source-code listing that is generated by this option.) The program will ask if you wish to add a slider bar; if so, hold down the mouse button to position the slider and then release the button to set it in place.
The program will then ask if you wish to add text to your box. Text you type will appear at the mouse location. If you make a mistake, press the right mouse button to start over (the backspace and other editing keys do not work). Do not press [Return] to enter your text; move the mouse to position it and click the left mouse button. The text for the three selectable boxes will be inverted when the user clicks on this box, so if you enter the text outside of the box, be sure to modify the code so the text is visible at all times.
Long Style Box: This option creates a long information box that contains a title and up to 10 lines of test with 18 characters per line. Enter the box title (it will be centered and set in bold) and then the text, a line at a time, at the prompts.
Radio Button Box: You can create a dialog box containing two, three, five or seven radio buttons; click on Help after selecting this option for more information on the possible combinations. You can enter a title for this box and then the selections that will appear under each box. Each box is of a fixed size; the labels appear under or next to the box. When you have entered the labels, an alert box gives the choice of labeling the buttons with a letter, number or nothing in each box.
Text Only Box: Select this option to create a free-form text box. Select the size to be a 1/2 size box (16 lines by 40 characters) or 3/4 (18 lines by 61 characters). Next, select whether to have the text ragged (as you type it) or centered in the box. Type in your text; if you want to abort enter *q or *Q.
Wide Style Box: This option creates a wide information box for a title and four lines of text with 70 characters per line. The text is not centered; it is positioned on the screen the way you type it.
Special Menus: When you select this option, a detached menu will appear on the screen with three selections: GEM Menus, Detached Menus and Bottom Up Menus. Click on the menu's close box to abort, or select one of the three options to create a menu. GFA Companion will load the overlay code segment containing the menu generator; if the overlay (OVL0I0, OVL020 or OVL030) is not present on disk the program will ask you to retry (enter a disk containing the overlay) or abort.
The following three options are the submenus to Special Menus:
GEM Menus: This option creates standard GEM-style menus. At the main screen, press [1] to generate a menu, [2] for help or [3] to return to GFA Companion's main menu. When you press [1] a prompt will ask how many items will be in the menu (12-65). The number of items include all titles and menu items, as well as overhead for the Desk menu and slots for six desk accessories. (Editor's note: refer to your GFA BASIC documentation, or the December 1988 "Programming in BASIC" column for details on the GFA BASIC menu structure and command syntax.)
At the next screen, you'll see the current number of items in the menu and the number of items left to go. The first entry in the menu bar array is Desk and is labeled entry 0; the first slot available to you is slot 10. At the prompt, enter the text for each item and press [Return]. Next, press [T] if you entered a menu title or [I] for a menu item. Enter *q or * Q at the item prompt to save or abort the current menu.
When you're finished entering the menu information, an alert box will ask if you want to Save, Abort or View the menu; if you click on View, the program will display the menu list's contents and then ask whether to Save or Abort the menu.
Detached Menus: After the title screen, select the size for your detached menu: Tiny, Medium, Large or X-Large. The only difference is the string length of the title and items; click on Help Me! to see the specific lengths. Select the number of items for the menu (from 2-12), then enter the title and the text for the items.
Bottom Up Menus: The titles of bottom up menus appear at the bottom of the screen; the menu's contents appear when the user clicks on the title. Other than that, these menus work the same way as GEM drop-down menus. In fact, GFA Companion's bottom up menus are compatible with GEM windows, so you can use both in the same program to increase menu choices. When you select the option to generate a bottom up menu, an alert box will ask you which resolutions your program supports. Low resolution can only have three titles; medium or high resolution can have six titles. Enter the number of titles to use, then type in the text for the titles. Next, enter the items for each title; you may have up to 15 items of 12 characters each above titles. To stop entering items for a title, press the [Tab] key and [Return]. To abort menu entry press [Escape] and [Return].
Utility
Quit: Quits GFA Companion.
What Version?: Click here to see the current version number.
Change Drives: This option sets a new destination drive for listings.
Use Desk.Acc: Click here to switch to a screen where menu options are disabled but desk accessories are enabled (on the main screen, desk accessories are grayed out).
Turn on Menu: This option returns you to the main-menu screen from the desk-accesory menu screen.
Using Companion Code
GFA Companion uses a temporary storage buffer (TEMPUSE$) for the screen
so screen redraws are performed automatically by any GFA Companion subroutine
your program calls.
You can move Companion's boxes around the screen and still read and recover the user's interaction with the box. The commented source code tells you which variables to change; typically these variables are Lx (far left x coordinate), Rx (far right x coordinate), Ty (top y coordinate) and By (bottom y coordinate). If you have a slider, its coordinates are generally Slx, Srx, Sty and Sby.
Most of the code GFA Companion generates is resolution-independent. There are, however, a few exceptions, and if you want to modify your code to work with all resolutions the best track is to modify the "move point" variables listed above: Lx, Rx, Ty and By.
Closing Remarks
I truly hope that you enjoy this program package as much as I enjoyed
putting it together for you. I also hope that you'll enjoy a lot of saved
hours of work, and a more professional user interface for your programs
as a result of this product.
John B. Holder heads Marathon Computer Press, recent developers of VDOS ProQueue, the alternate desktop (reviewed in the October 1989 issue of START). He also wrote the program Vocabularian in the October 1988 issue of START
John can be reached at Marathon Computer Press, P.O. Box 68503, Virginia Beach, VA 23455-9433, (804) 460-5227.