Apple Hi-Res Screen Dump
Mark Russinovich
You can easily dump high-resolution graphics pictures onto a dot matrix printer with this efficient machine language utility. It's also an ideal way to add a screen dump option to your own BASIC programs. It requires an Apple IIe or II+ computer with at least 48K RAM and an Epson or Epson-compatible printer, as well as an Epson or Epson-compatible parallel interface card that connects to slot 1. For both DOS 3.3 and ProDOS.
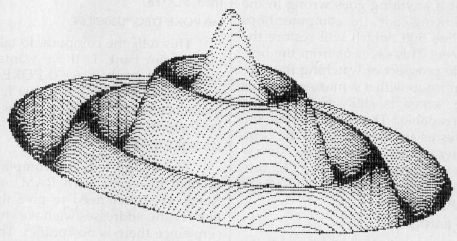
Have you ever wished you could print out an image that appears on the hi-res screen? This can be useful for inserting graphs or charts directly into text, or just saving interesting pictures and mathematical plots. With the program below, "DUMP," you can do all these things with minimal effort.
Using DUMP
To get started, type in Program 1 using the "Apple MLX" machine language entry program found elsewhere in this issue. Be sure you understand the instructions for using MLX before you begin entering the data from Program 1. The required starting and ending addresses for DUMP are:
Starting address : 9000
Ending address : 91DF
After you finish typing in the data, use MLX to save it to disk with the name DUMP. To install DUMP in memory for later use, just type BRUN DUMP. It loads itself into memory, protects itself from AppleŁsoft by resetting HIMEM, and changes the ampersand vector to allow access from Applesoft.
Program 2 makes it easy to catalog disks, load hi-res pictures, view the pictures, and dump them on the printer. Just select the function you want from the menu. When you choose to print the hi-res screen, the program asks you to specify the size of the printout. There are nine sizes, ranging from a small block to a full page. (Owners of Epson MX-series printers should note that sizes 2, 3, 6, and 7 will not work with their printers. These sizes use codes available only on Epson's newer FX and RX models.) Next you'll be asked for a tab value. This lets you position the picture exactly where you want it. Specify the tab value in pica characters, making sure the value does not exceed the width of the page minus the width of the picture. Otherwise, the picture might be cut off at the edge of the page, or wrap around to the middle. If you enter a tab value of zero, DUMP automatically centers the picture on the page.
Table of DUMP Sizes
| Size | Width Pica | Width Elite | Width Inch | Height Char | Height Inch |
| 1 | 24 | 28 | 2.31 | 14 | 2.31 |
| 2 | 35 | 42 | 3.50 | 14 | 2.31 |
| 3 | 35 | 42 | 3.50 | 32 | 5.31 |
| 4 | 47 | 56 | 4.62 | 14 | 2.31 |
| 5 | 47 | 56 | 4.62 | 32 | 5.31 |
| 6 | 58 | 69 | 5.75 | 32 | 5.31 |
| 7 | 58 | 69 | 5.75 | 48 | 8.00 |
| 8 | 70 | 84 | 7.00 | 32 | 5.31 |
| 9 | 70 | 84 | 7.00 | 48 | 8.00 |
To embed a picture within the text of a document, you should leave room for the pictures in your document by changing the margins. For your convenience, the accompanying table shows the widths and heights of all nine print sizes. After printing out your document, rewind the paper to position the print head about one line above the space you left for the picture. Then run Program 2 and request the size and tab value you planned for. This procedure might take a little practice before you can place a picture exactly where you want it.
Note that DUMP sets the printer to all of its default values after running. If you were using a special mode or typeface, you'll have to restore that mode after running DUMP.
DUMP With Other Programs
DUMP is especially handy when used with graphing and drawing programs, and for this reason you may want to add it to programs of your own. To do this, add a line at the beginning of the program similar to this:
10 PRINT CHR$(4);"BRUN DUMP"
Later in the program, add a screen dump option to your menu. Prompt the user for size and tab values, then enter this command:
&P, S, T
where P specifies hi-res page (1 or 2), S is the size (1-9, but remember the MX-series limitation mentioned above), and T is the tab value. Program 2 is an example of how this is done. Numbers, variables, or expressions can be used in the command. For instance, to print out hiŁres page 1, with a size of 3 and a tab of 15, this form could be used:
10 A = 15
20 & 1, A/5, A
After DUMP has finished printing the picture, it returns control to Applesoft and the program continues running.
The ampersand command can also be entered in immediate mode.
Program 1: MLX Data For DUMP
9000 : A9 4C 8D F5 03 A9 18 8D 96
9008 : F6 03 A9 90 8D F7 03 A9 9F
9010 : FF 85 73 A9 8F 85 74 60 77
9018 : 20 5B 91 20 F8 E6 E0 01 7A
9020 : F0 07 E0 02 F0 07 20 C9 65
9028 : DE A9 20 D0 02 A9 40 85 F0
9030 : E6 20 BE DE 20 F8 E6 E0 26
9038 : 0A B0 1A CA 8E D5 91 20 89
9040 : BE DE 20 F8 E6 E0 00 D0 97
9048 : 06 AC D5 91 BE 6B 91 8E C0
9050 : DB 91 4c 58 90 20 C9 DE 4A
9058 : A0 00 84 F9 84 Fa 84 EF 03
9060 : 84 FB 84 FD 84 FE 84 FF 5C
9068 : AC D5 91 A9 1B 20 62 91 D1
9070 : A9 33 20 62 91 B9 74 91 4B
9078 : 20 62 91 B9 7D 91 8D D6 34
9080 : 91 B9 86 91 BD D7 91 B9 6B
9088 : 8F 91 8D D8 91 AA CA 8E 70
9090 : D9 91 B9 98 91 8D DA 91 CD
9098 : 98 0A AB B9 A8 91 85 06 D5
90A0 : B9 A9 91 85 07 A0 00 B1 FF
90A8 : 06 99 DC 91 C8 C0 03 D0 08
90B0 : F6 A9 0A 20 62 91 AC DB 89
90B8 : 91 F0 0B A9 20 20 62 91 52
90C0 : 88 D0 F8 A0 00 A9 1B 20 80
90C8 : 62 91 B9 DC 91 20 62 91 E7
90D0 : C8 C0 03 D0 F5 A5 FB 85 B7
90D8 : FC A5 FC C9 C0 B0 28 A6 DD
90E0 : F9 A4 FA 20 11 F4 A4 EF 1F
90E8 : B1 26 A4 FF 39 A1 91 F0 65
90F0 : 16 AD DA 91 A4 FD F0 0B 07
90F8 : AE D6 91 4A CA D0 FC 88 1A
9100 : 4C F6 90 05 FE 85 Fe E6 5C
9108 : FC E6 FD A5 FD CD D8 91 E7
9110 : D0 C7 A5 FE AC D7 91 20 3A
9118 : 62 91 88 D0 FA A9 00 85 F2
9120 : FE 85 FD E6 FF A5 FF C9 B2
9128 : 07 D0 06 E6 EF A9 00 85 DD
9130 : FF E6 F9 D0 02 E6 FA A5 A0
9138 : F9 C9 18 D0 98 A5 FA F0 1D
9140 : 94 A9 00 85 EF 85 F9 85 7F
9148 : FA A5 FB 6D D9 91 85 FB C4
9150 : C9 C0 B0 03 4C B1 90 20 39
9158 : 5B 91 60 A9 1B 20 62 91 E3
9160 : A9 40 AE C1 C1 30 FB 8D AE
9168 : 90 C0 60 1D 16 16 11 11 1E
9170 : 0A 0A 05 05 15 15 12 15 42
9178 : 12 12 12 12 12 01 01 02 25
9180 : 01 02 02 03 02 03 01 03 36
9188 : 03 01 01 05 05 03 03 07 1F
9190 : 07 03 07 03 03 02 03 02 31
9198 : 40 40 60 40 60 60 70 60 C1
91A0 : 70 01 02 04 08 10 20 40 BD
91A8 : BA 91 BD 91 C0 91 C3 91 C3
91B0 : C6 91 C9 91 CC 91 CF 91 CB
91B8 : D2 91 4C 18 01 5A 48 03 B9
91C0 : 5A 48 03 4B 18 01 4B 18 AB
91C8 : 01 5A 78 05 5A 78 05 4C 6D
91D0 : 48 03 4C 48 03 A2 D6 C9 01
91D8 : A5 8A A0 C5 C8 FF A0 31 9A
Program 2: DUMP Example
B1 10 ONERR GOTO 40
52 20 D$ = CHR$ (4)
D5 30 PRINT D$"BRUN DUMP"
55 40 TEXT : HOME
13 50 HTAB 9 : PRINT "********************" : HTAB 9 :
      PRINT "*			*" : HTAB 9 : PRINT "
      * APPLE HI-RES DUMP * " : HTAB 9 :  PRINT "*		*
      " : HTAB 9 : PRINT "*********************"
1F 60 PRINT : PRINT : PRINT : HTAB 12 : PRINT "ENTER CHOICE :" :
       HTAB 12 : PRINT "-------------": PRINT : HTAB 12 : PRINT "1)
       CATALOG" : PRINT : HTAB 12 : PRINT "2) LOAD SCREEN"
BA 70 PRINT : HTAB 12 : PRINT "3) VIEW SCREEN" : PRINT : HTA B 12
       : PRINT "4) PRINT SCREEN" : PRINT : HTAB 12 : PRINT "5) QUIT"
D7 80 VTAB 22 : HTAB 12 : BET A$ : IF A$ = "1" THEN 140
2A 90 IF A$ = "2" THEN 160
F6 100 IF A$ = "3" THEN 170
74 110 IF A$ = "4" THEN 200
48 120 IF A$ = "5" THEN END
D0 130 PRINT CHR$ (7) : GOTO 80
60 140 PRINT : HOME : PRINT D$"CATALOG"
E3 150 PRINT : PRINT "PRESS ANY KEY:"; : GET A$ : GOTO 40
DD 160 PRINT : VTAB 22 : INPUT "ENTER FILE NAME: ";FL$ : PRINT
       D$"BLOAD"FL$", A$2000" : HOME : GOTO 40
81 170 POKE - 16302, 0 : POKE - 16297,0 : POKE - 16304, 0 : POKE - 16368, 0
67 180 X = PEEK ( - 16384) : IF X< 128 THEN 180
2B 190 POKE - 16368, 0 : TEXT : HOME : GOT0 40
11 200 PRINT : VTAB 22 : INPUT "ENTER SIZE OF DUMP (1-9) :
       ";S : IF S < 1 OR S > 9 THEN 200
DD 210 VTAB 24 : PRINT " (0 = AUTO CENTER)"; : VTAB 23 : HTAB 1
      : INPUT "ENTER TAB SETTING : ";T : IF T < 0 OR T > 50 THEN 210
7A 220 POKE - 16302, 0 : POKE - 16297, 0 : POKE - 16304,0: & 1, S, T
     :	 TEXT : HOME : GOTO 40